Tutorial 282 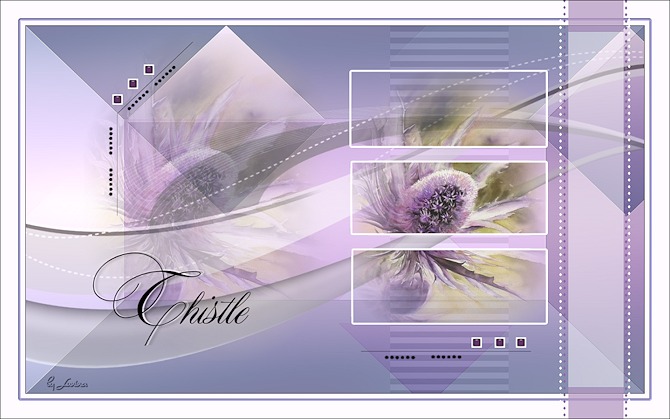
Obrigada VaZsu por autorizar a tradução  Material Aqui Plugins
Filter Unlimited Mehdi Caroline and Sensibility 1. Abra o "Watercolor Background" Adjust / Blur / Gaussian Blur / Radius 50 2. Effects / Plugins / Filters Unlimited / Buttons & Frames / Rectangular Button / 130 / 50 / 40 / Outline desmarcado 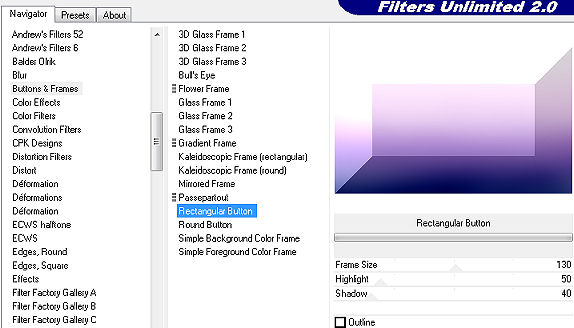
3. Layers / Duplicate
Image / Flip - Baixe a opacidade da layer para 50% 4. Effects / Plugins - Mehdi / Sorting Tile: Block Range 300-500 / Block 389 / Crossed marcado 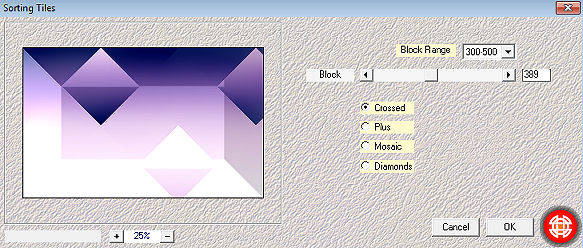
5. Effects / Edge Effects / Enhance (aplique nas 2 layers)
Layers / Merge Down 6. Ative a ferramenta Selection / Custom Selection: Top 0 / Left 707 / Right 937 / Bottom 750 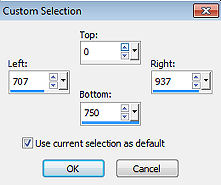
Selections / Promote selection to layer 7. Effects / Plugins / Caroline and Sensibility / CS-H Lines: 8 / 0 / 10 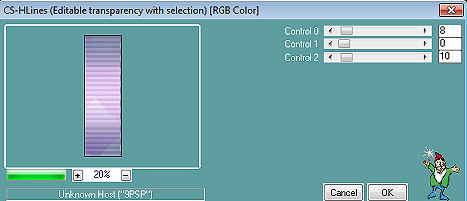
Selections / Select none 8. Abra o tube "Thistle" Edit / copy Edit / paste as new layer na imagem Effects / Image effects / Offset: -235 / 25 / Custom e Transparent marcados 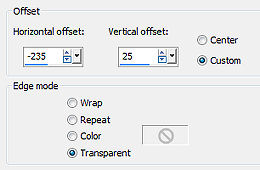
Baixe a opacidade para 50% 9. Abra o "VaZsu Decor"
Image / Mirror
Copie e cole como nova layer na imagem.
Baixe a opacidade para 50% 10. Abra a "VaZsu Selection" Com a varinha mágica, clique nas áreas brancas para selecioná-las
Selection / Load/ave Selection / Save Selection to Alpha Channel Clique em "Save" Minimize a seleção no Psp 11. Abra uma nova imagem transparente de 1200 x 750 px Copie novamente o tube "Thistle" Edit / paste as new layer nessa nova imagem Selections / Load/save selection / Load selection from Alpha Channel 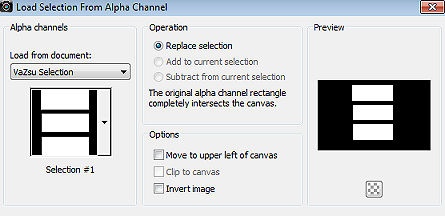
Teremos isso: 
Selections / Promote selection to layer 12. Com a layer Promoted selection ativa Selection / Modify / Select Selection Borders: Outside / 4 / anti-alias marcado 
13. Pinte a seleção com a cor branca Selections / Select none 14. Edit / copy 15. Volte á imagem principal Edit / paste as new layer Image / resize 87%, resize all layers desmarcado Effects / Image effects / Offset: 220 / 25 / Custom e Transparent marcados 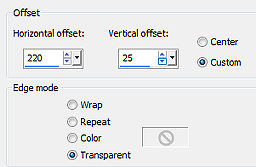
16. Coloque no foreground a cor preta Ative a ferramnenta Pen Tool / Line Styled Solid / Widht 1,00 Trace linhas como mostro 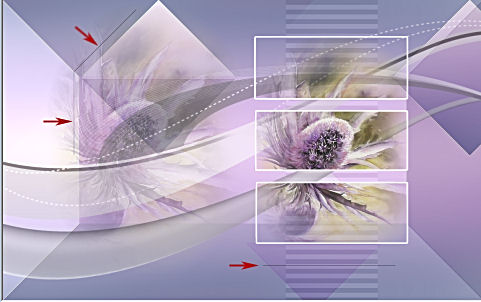
Na layer palette / Convert to Raster layer 17. Abra o "Dot Decor 1" - Edit / copy Edit / paste as new layer. Duplique Posicione onde mostro 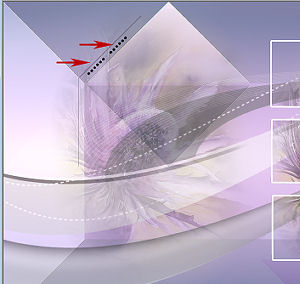
18. Abra o "Dot Decor 2" - Edit / copy Edit / paste as new layer. Duplique Posicione onde mostro 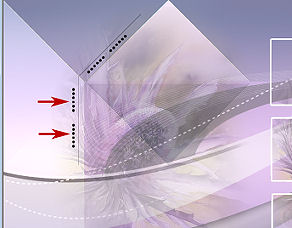
19. Abra o "Dot Decor 3" - Edit / copy Edit / paste as new layer. Duplique Posicione onde mostro 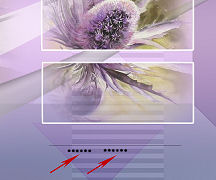
20. Abra o "VaZsu Buttom" - Edit / copy Edit / paste as new layer na imagem Image / Resize 65%, resize all layers desmarcado Duplique 5 vezes e posicione os botões como mostro: 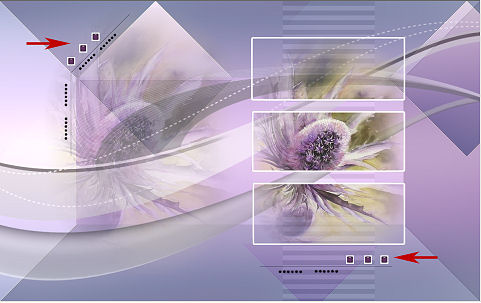
21. Abra a letra "T" - Edit / copy Edit / paste as new layer na imagem Effects / Image effects / Offset: -360 / -180 / Custom e Transparent marcados 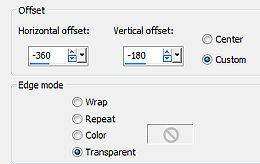
22. Abra o "Thistle Subtitle" - Edit / copy Edit / paste as new layer na imagem Effects / Image effects / Offset: -317 / -183 / Custom e Transparent marcados 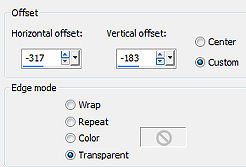
23. Image / add borders / 1 px na cor preta Edit / copy 24. Abra a "Base Image" Slections all Selections / Modify / Contract 45 px 25. Edit / paste into selection Selections / Select none 26. Abra o "Vazsu Decor Line" - Edit / copy Edit / paste as new layer na imagem Effects / Image effects / Offset: 450 / 0 / Custom e Transparent marcados 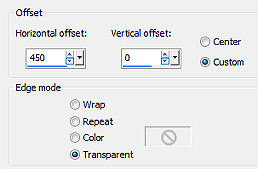
Com a ferramenta Pick ou Deform, dê uma estreitada nessa faixa, assim: 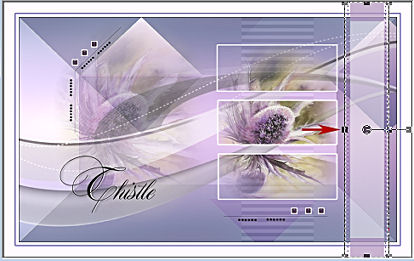
27. Assine e salve como Jpeg. https://vazsupsptutorials.weebly.com/vazsu-tutorial-282.html |  |
|


