| Paasles 2025 
Obrigada Mieke por autorizar a tradução  Material Aqui Filters <I C Net Software> Filters Unlimited 2.0 / V.M.Texture Flaming Pear / Flexify 2 Carolaine and Sensibility / CS-LDots Mura`s Meister / Perspective Tiling Cores Foreground na cor #ebe7dc e Background na cor #de992c Forme o gradiente Style Linear / Angle 90 / Repeat 1 / Invert marcado 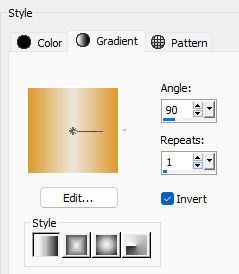
Abra uma umagem transparente com Width 960 e Height 600 pixels 1. Pinte a imagem com o gradiente 2. Selections / Select All 3. Abra o tube 35de6e-removebg-preview.png Edit / Copy Edit / Paste into selection na imagem Selections / Select none 4. Adjust / Blur / Radial blur: Spin / Strength 70 / Eliptical / Horizontal offset -30 / Vertical offset -50 / Protect center 0 
5. Effects / Distortion effects / Pixelate: Block width 270 / Block height 200 
6. Layers / Duplicate 7. Effects / Plugins / <I C Net Software> Filters Unlimited 2.0 / V.M.Texture / Cross Weave / Set transparency em 0 / restante sem alteração 
8. Effects / 3D Effects / Drop Shadow: 0 / 0 / 70 / 35 - Cor preta 9. Effects / Plugins / Flaming Pear / Flexify 2: Input equirectangular / Output cylindrical / restante sem alterações 
10. Effects / Distortion Effects / Polar Coordinates / Rectangular to Polar / Transparent 
11. Effects / Plugins / Flaming Pear / Flexify 2: Input / equirectangular / Output / Wetch / restante sem alterações 
12. Effects / Plugins / Flaming Pear / Flexify 2: Input equirectangular / Output square / restante sem alterações 
13. Effects / Image Effects / Seamless Tiling / Preset: Side by Side 
14. Layers / Duplicate Layers / Merge / Merge Down Effects / 3D Effects / Drop Shadow: 0 / 0 / 70 / 35 – Cor preta Mude o Blend Mode dessa layer para Overlay 15. Abra o tube deco-1.png Edit / Copy Edit / Paste as new layer na imagem 16. Layers / Duplicate Image / Free Rotate / 90% Left 
17. Image / Resize em 50% - Resize all layers desmarcado 18. Effects / Image Effects / Offset: -400 / 0 / custom e Transparent marcados 
Layers / Duplicate Image / Mirror 19. Ative a layer de fundo / (raster 1) Effects / Plugin / Carolaine and Sensibility CS-LDots: 255 / 3 / 2 
20. Layers / Duplicate Effects / Plugins / Mura`s Meister / Perspective Tiling 1.1: Height 20 
21. Effects / Reflection effects / rotating mirror: 0 / 0 / Reflect 
22. Ative a ferramenta varinha mágica / Tolerance 0 e Feather em 40 Clique na parte superior e pressione a tecla delete 4 vezes Selections / Select none 23. Ative a layer do topo Abra o tube 35de6e-removebg-preview.png Edit / Copy Edit / Paste as new layer na imagem Posicione o tube como você achar adequado Effects / 3D effects / Drop shadow: 0 / 0 / 70 / 35. Cor preta 24. Ative a layer do topo 25. Abra o tube 9b1-removebg-preview.png Edit / Copy Edit / Paste as new layer na imagem Posicione o tube onde achar adequado Effects / 3D effects / Drop shadow: 0 / 0 / 70 / 35. Cor preta 26. Border Image / Add borders / 2 pixels com a cor escura Selections / Select all Image / Add borders / 40 pixels com a cor clara Effects / 3D effects / Drop shadow: 0 / 0 / 70 / 35. Cor preta Selections / Select none. Image / Add borders / 2 pixels com a cor escura Assine Salve como JPEG https://www.pspmieke.nl/lessen/paasles-2025/pasen-2025.html | 
 AimooHelpForum
Aimoo Forum List |
Ticket |
Today |
Member |
Search |
Who's On |
Chat Room | Photos | Help |
Sign In |
AimooHelpForum
Aimoo Forum List |
Ticket |
Today |
Member |
Search |
Who's On |
Chat Room | Photos | Help |
Sign In |
 |
|


