| Les 275 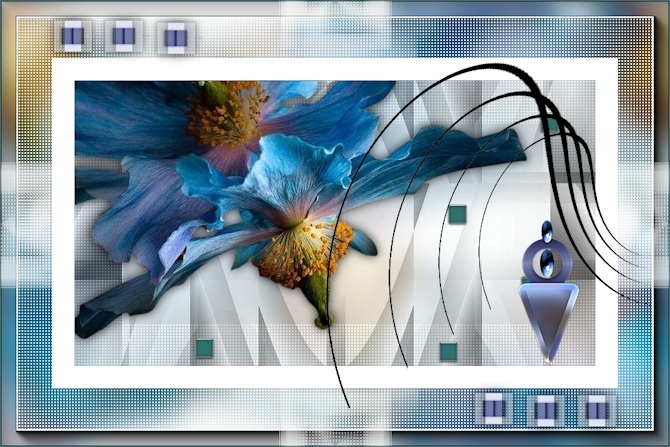
Obrigada Mieke por autorizar a tradução  Material Aqui Plugins -<I C Net Software> Filters Unlimited 2.0 / Alf Import / sq border 2 AAA Frames / Photo frame Cores: Foreground #528089 e background #ffffff Forme no foreground o gradiente Style Linear: Angle 0 / Repeats 1 / Invert desmarcado 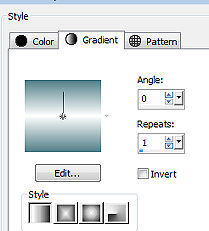
1. Abra uma imagem transparente com Width em 900 e Height em 600 2. Pinte a imagem com o gradiente 3. Selections / Select all 4. Abra o tube 62d7f6.png 5. Edit / Copy Edit / Paste into selection na imagem 6. Selections / Select none 7. Effects / Image Effects / Seamless Tiling / Settings: Default 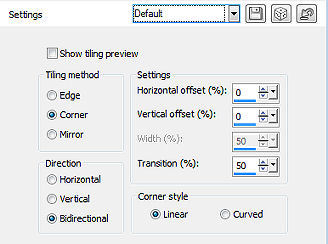
8. Adjust / Blur / Gaussian Blur / Radius: 20 9. Effects / Plugins / <I C Net Software> Filters Unlimited 2.0 / AFS Import / sq border 2 / Default 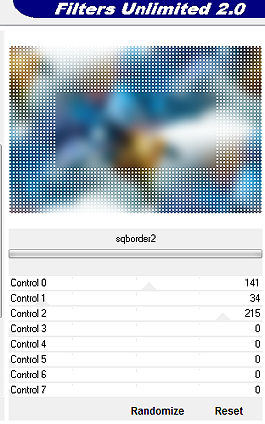
10. Effects / Plugins / AAA Frames / Photo frame: 20 / 0 / 0 / 2 / 0 / 0 / 0 / 100 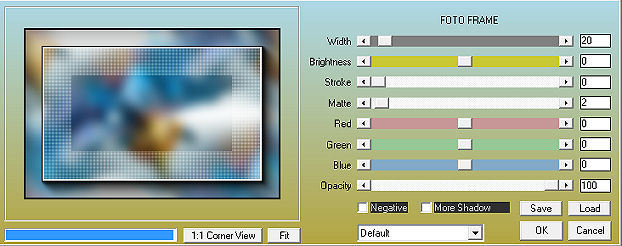
11. Abra a frame-1aa-.png. Edit / Copy Edit / Paste as a new layer na imagem Adjust / Sharpness / Sharpen 12. Abra o tube 62d7f6.png Edit / Copy Edit / Paste as a new layer na imagem Aperte a tecla k e configure Position x em 94 e Position Y em 108 
Aperte a tecla M 13. Effects / 3D Effects / Drop Shadow: 0 / 0 / 80 / 20. Cor preta 14. Abra a frame-1a.png Edit / Copy Edit / Paste as a new layer na imagem 15. Abra o tube blokjes.png Edit / Copy Edit / Paste as a new layer na imagem Aperte a tecla k e configure Position X em 258 e Position Y em 148 
16. Abra o deco-1.png Edit / Copy Edit / Paste as a new layer na imagem Configure Position x em 697 e Position Y em 295 
17. Abra o deco-12.png Edit / Copy Edit / Paste as a new layer na imagem Configure Position X em 438 e Position Y em 82 
18. Abra o deco-2.png Edit / Copy Edit / Paste as a new layer na imagem Configure Position X em 66 e Position Y em 20 
Aperte a tecla M 19. Effects / 3D Effects / Drop Shadow: 0 / 0 / 80 / 20. Cor preta 20. Layers / Duplicate Image / Mirror (Mirror / Flip Horizontal) Image / Flip (Mirror / Flip Vertical) 21. Image / Add Borders / 1 pixels na cor escura Assine Salve como JPEG https://www.pspmieke.nl/lessen/les-275/les-275.html |  |
|


