| Tutorial 298 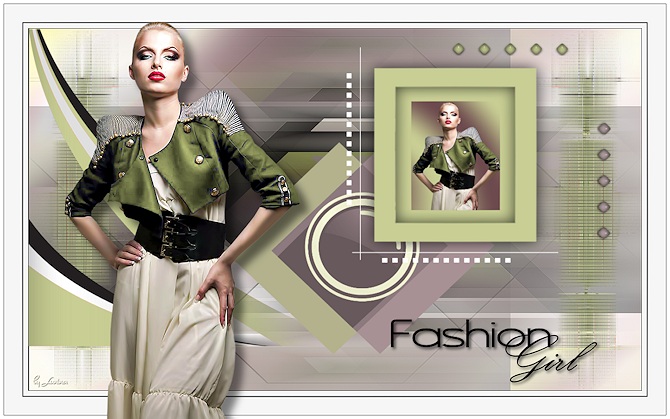
Obrigada VaZsu por autorizar a tradução 
Material Aqui Cores Usadas 
Coloque no foreground a cor #bd9d99 e no background a cor #6d4a4e 1. Abra uma imagem de 1200 x 750 pixels Effects / Plugin / Mehdi / Wavy lab 1.1: Style Bow / 2 / 136 / 0 / 78 - cores 2 / 1 / 3 / 4 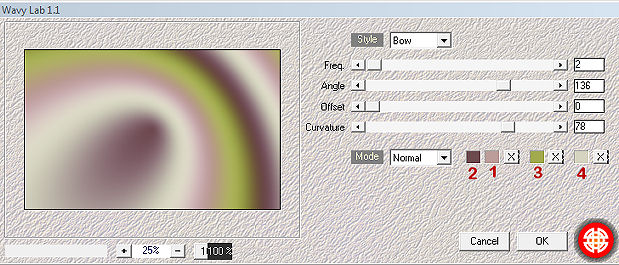
2. Effects / Plugin / Filter Unlimited / ºVº Kiwi's Oelfilter / ZigZack: 70 / 160 / 128 / 128 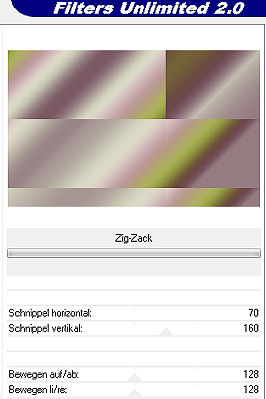
3. Layers / Duplicate Effects / Plugin / Filter Unlimited / ºVº Kiwi's Oelfilter / Videowand: 200 / 0 / 0 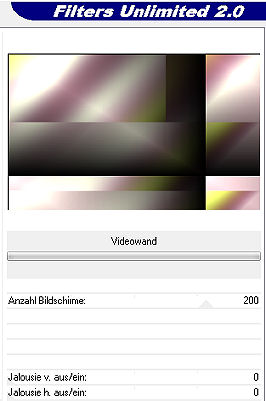
4. Layers / duplicate Effects / Plugin / Filter Unlimited / Simple / Left Right Wrap 5. Effects / Plugin / Filter Unlimited / Simple / Diamonds 6. Aplique nessa layer a mask 2020 ou névoa 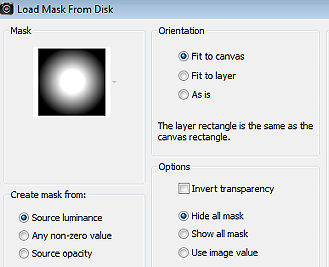
7. Layers / Merge group Teremos isso: 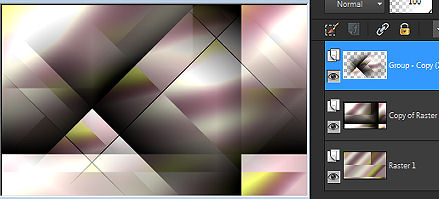
Layers / Merge Visible 8. Effects / Plugin / Filter Unlimited / VM Stylize / Motion Trail: 112 / 128 / 18 /99 / 15 / 255 / 255 / 255 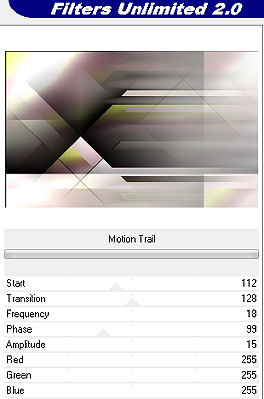
9. Layers / Duplicate Effects / Plugin / Filter Unlimited / Simple / 4 Way Average 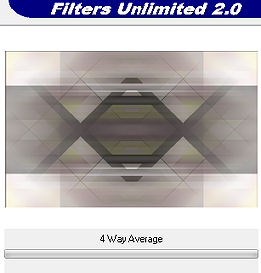
Baixe a opacidade dessa layer para 50% Effects / Edge / Enhance Layers / Merge visible 10. Abra o "Vazsu Line Decor 1" - Edit / copy Edit / paste as new layer na imagem Effects / Image effects / Offset: -490 / 0 / Custom e Transparent marcado 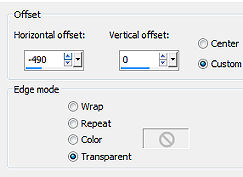
11. Layers / duplicate Image / Mirror 12. Abra o "Vazsu Line Decor 2" - Edit / copy Edit / paste as new layer na imagem Effects / Image effects / Offset: -318 / 45 / Custom e Transparent marcado 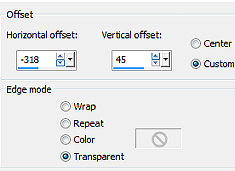
13. Abra o "Vazsu Square Decor" - Edi / copy Edit / paste as new layer na imagem Effects / Image effects / Offset: 48 / -80 / Custom e Transparent marcado 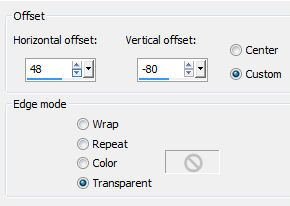
14. Abra o "Image Back" - Edit / copy Edit / paste as new layer na imagem Image / Resize / 42%, resize all layers desmarcado Effects / Image effects / Offset: 236 / 105 / Custom e Transparent marcado 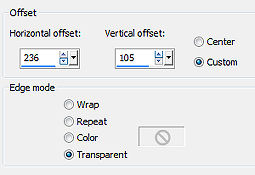
15. Abra o tube "Femme 675 by Lily" - apague a marca dágua 16. Trace uma seleção, como mostro: 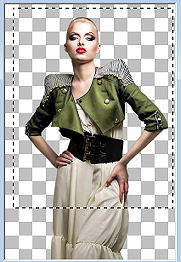
Edit / Copy 17. Edit / paste as new layer na imagem Image / Resize / 42%, resize all layers desmarcado Posicione o tube sobre a "Image Back", assim 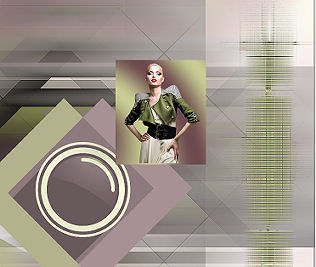
18. Abra a "Vazsu Frame" - Edit / copy Edit / paste as new layer na imagem Posicione sobre a "Image Back" formando um quadro, assim: 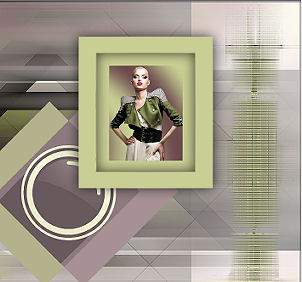
19. Abra a "Vazsu Line Decor" - Edit / copy Edit / paste as new layer na imagem Posicione na lateral esquerda do quadro 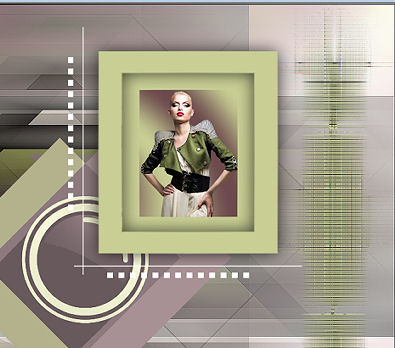
20. Abra o "Vazsu Buttons 1" - Edit / copy Edit / paste as new layer na imagem Posicione acima do quadro, à direita: 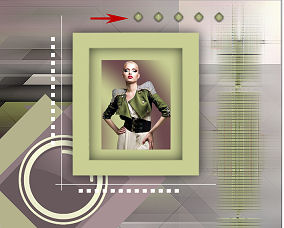
21. Abra o "Vazsu Buttons 2" - Edit / copy Edit / paste as new layer na imagem Posicione à direita acima do quadro: 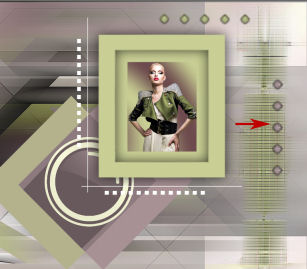
22. Slections / select all Selections / Modify / Contract / 3 px Image / Crop to selection 23. Image / Add borders / 1 px na cor preta Edit / copy 24. Abra a "Base Image" Selections / Select all Selection / Modify / Contract / 50 pixels 25. Edit / paste into selection Selections / select none 26. Abra o "Subtitle" - Edit / copy Edit / paste as new layer Effects / Image effects / Offset: 288 / -255 / Custom e Transparent marcado 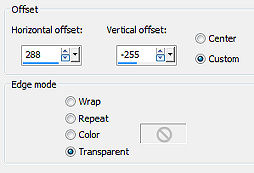
27. Abra novamente o tube " Femme 675 by Lily" (Não esqueça de tirar a seleção anterior) Edit / copy Edit / paste as new layer na imagem Posicione à esquerda, como no modelo final. Effects / 3D Drop Shadow: 15 / 15 / 50 / 20,00 - preto 28. Assine e Salve como Jpeg. https://vazsupsptutorials.weebly.com/vazsu-tutorial-298.html |  |
|


