Tutorial 278 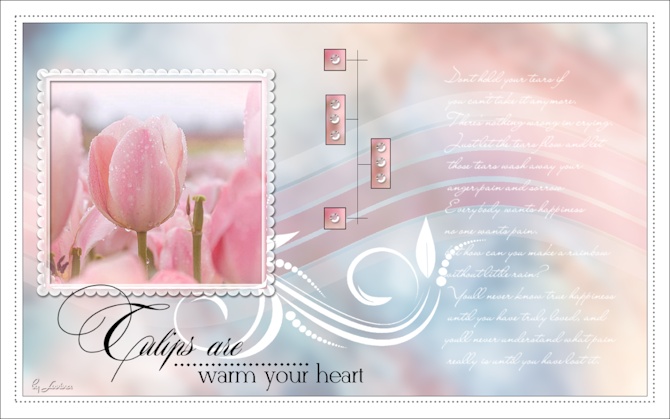
Obrigada VaZsu por autorizar a tradução  Material Aqui 1. Abra o "Watercolor 1 e o Watercolor 2" Duplique-os e minimize os originais. Abra a cópia do Watercolor 1 Abra o Watercolor 2 - Edit / copy Edit / paste as new layer sobre o Watercolor 1 Baixe a opacidade para 50% Layers / Merge Visible A imagem estará assim: 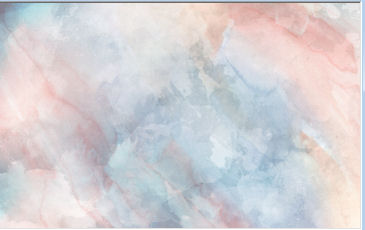
2. Adjust / Blur / Gaussian blur / Radius 10 Salve como "novo background" 3. Abra a imagem Joanna Froese Tulip
Adjust / Blur / Gaussian Blur 20 4. Ative a ferramenta Selection / Custom selection: Top 100 / Left 0 / Right 1200 / Bottom 150 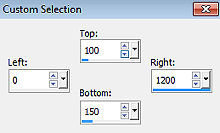
Selections / Promote selection to layer Selections / select none 5. Ative a layer abaixo para traçar uma nova seleção Ative a ferramenta Selection / Custom selection: Top 325 / Left 0 / Right 1200 / Bottom 435 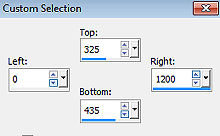
Selections / Promote selection to layer Selections / select none 6. Ative novamente a layer de fundo para traçar uma nova seleção Ative a ferramenta Selection / Custom selection: Top 500 / Left 0 / Right 1200 / Bottom 550 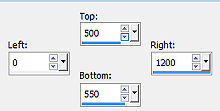
Selections / Promote selection to layer Selections / select none 7. Tire a visibilidade da layer de fundo e vamos aproximar as 3 faixas, assim: 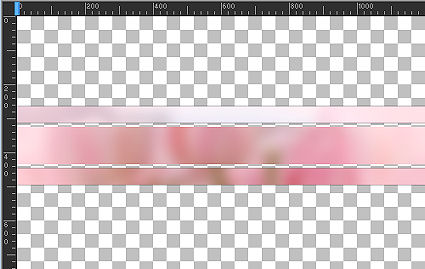
Layers / Merge Visible 8. Effects / Plugins / Filters Unlimited / Bkg Designer sf10I/ Cruncher: 20 / 20 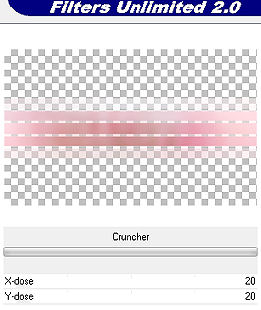
9. Effects / Plugins / Filters Unlimited / Bkg Designer sf10II / Muru's Wave / Default 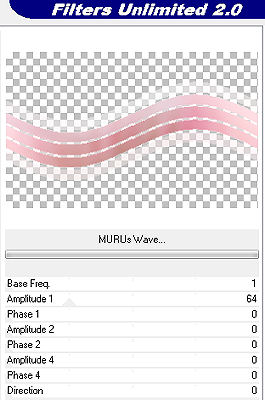
Edit / copy 10. Abra a base salva "novo background" Edit / paste as new layer Baixe a opacidade da layer para 50% 11. Abra nova layer e pinte com a cor branca Abra a mask smArt_maszk_65 Layers / new mask layer from image Aplique a mask 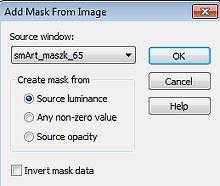
12. Com a ferramenta Pick, encolha o texto da esquerda para a direita, e centralize assim: 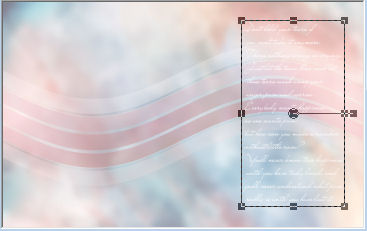
13. Layers / new raster layer Pinte novamente com a cor branca Abra a VaZs Mask e minimize no psp Layers / new mask layer from image Aplique a mask com Invert mask data marcado 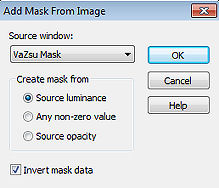
Layers / Merge group 14. Image / Resize / 76%, resize all layers desmarcado Effects / Image effects / Offset: -55 / -80 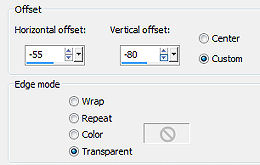
15. Abra a imagem Johanna Froese Image 2 Edit / copy Edit / paste as new layer na imagem Image / Resize 90%, resize all layers desmarcado Effects / Image effects / Offset: -343 / 52 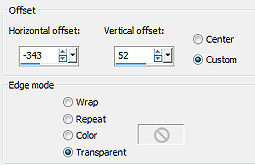
16. Abra a VaZsu Frame - Edit / copy Edit / paste as new layer na imagem Aplique o mesmo Offset anterior 17. Abra o tube Lines - Edit / copy Edit / paste as new layer na imagem Posicione na parte central superior, assim: 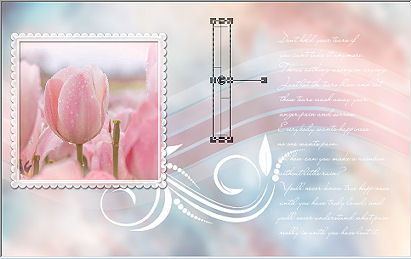
18. Abra o Vazsu Decor 1 - Edit / copy Edit / paste as new layer na imagem Duplique e posicione, como mostro 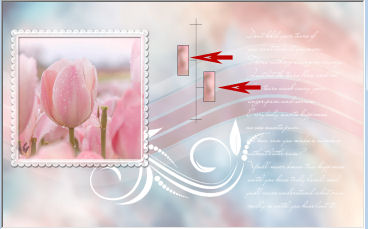
19. Abra o Vazsu Decor 2 - Edit / copy Edit / paste as new layer na imagem Duplique e posicione, como mostro 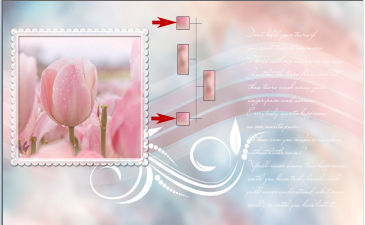
20. Abra o Roundglass - Edit / copy Edit / paste as new layer na imagem Image / Resize / 32%, resize all layers desmarcado Duplique e posicione, como mostro: 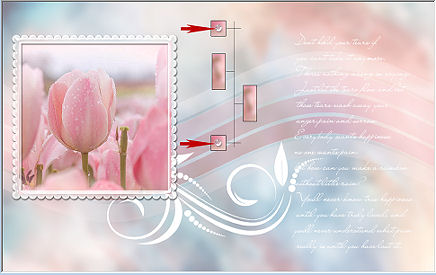
21. Duplique mais 6 vezes e posicione assim: 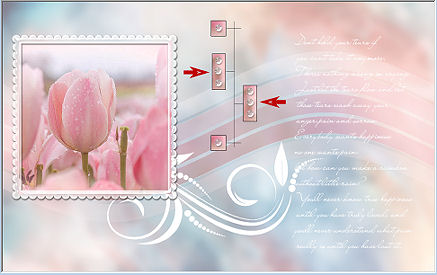
22. Abra o Subtitle - Edit / copy Edit / paste as new layer na imagem Effects / Image effects / Offset: -240 / -258 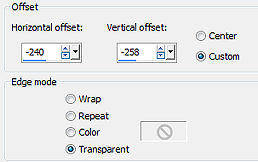
23. Image / Add borders / 1 px na cor preta Edit / copy 24. Abra a Base Image Selections / all Selections / Modify / Contract / 40 pixels 25. Edit / paste into selection Selections / select none 26. Assine e Salve como Jpeg. https://vazsupsptutorials.weebly.com/vazsu-tutorial-278.html
|  |
|


