Tutorial 247 
Obrigada VaZsu por autorizar a tradução  Material Aqui Plugins Unlimited VM Toolbox Mehdi Simple Tramages 1. Coloque no foreground a cor #a94bb9 e no background a cor #292941 Abra uma imagem de 1200 x 750 pixels, transparente Effects / Plugins / Mehdi / Wavy lab 1.1: Style Linear 2 / 90 / 0 
2. Effects / Image Effects / Seamless Tiling / Default 3. Layers / Duplicate
Effects / Plugins / Filters Unlimited / Simple / Blitz 4. Layers / duplicate
Image / Flip 5. Baixe a opacidade da layer para 50% 
6. Com a layer do topo ativa Layers / Load/save mask / load mask from disk Aplique a mask 20/20 
Layers / merge group 7. Layers / merge down Effects / Edge effects / enhance 8. Effects / Plugins / Filters Unlimited / Bkg Kaleidoscope / BlueBerryPie 
9. Effects / Plugins / Filters Unlimited / Vm Toolbox / MirroriM 
10. Abra a "Vazsu Selection", Clique com a varinha mágica na área branca Selections / load/save selection to alpha channel Clique em Save e minimize no Psp 11. Volte à imagem principal Selections / load/save selection from alpha channel 12. Selection / promote selection to layer Selections / select none Delete a layer abaixo (do meio) 13. Ative a layer de fundo Ative a ferramenta Selection / Custom selection: Top 0 / Left 200 / Right 398 / Bottom 750 
14. Effects / Plugins / Filters Unlimited / Tramages / Tow The Line: 80 / 54 / 48 / 9 
Selections / select none Ative a layer do topo 15. Abra o "@ildiko_create_decort" - Edit / copy Edit / paste as new layer na imagem Effects / image effects / Offset: 336 / 210 / Custom e Transparent marcados 
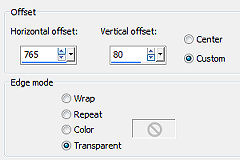
16. Layers / duplicate Image / mirror Image / flip Image / free rotate / 90 Left Effects / image effects / Offset: 765 / 80 / Custom e Transparent marcados 
17. Abra o "Vazsu Decor" - Edit / copy Edit / paste as new layer na imagem Effects / image effects / Offset: -100 / 57 / Custom e Transparent marcados 
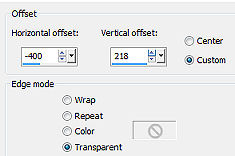
18. Abra a "Vazsu Frame" - Edit / copy Edit / paste as new layer na imagem Effects / image effects / Offset: -400 / 218 / Custom e Transparent marcados 
Effects / 3D Drop shadow: 3 / 3 / 70 / 10,00 - preto 19. Layers / duplicate Effects / image effects / Offset: 240 / -205 / Custom e Transparent marcados 
20. Abra o "Vazsu Button" - Edit / copy Edit / paste as new layer na imagem Effects / image effects / Offset: -160 / 12 / Custom e Transparent marcados 
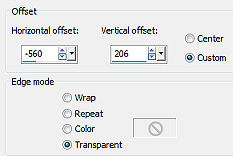
21. Layers / duplicate Image / mirror Effects / image effects / Offset: -560 / 206 / Custom e Transparent marcados 
22. Abra o "Subtitle" - Edit / copy Edit / paste as new layer na imagem Effects / image effects / Offset: -260 / -250 / Custom e Transparent marcados 
23. Image / add borders / 1 px na cor #a94bbb Edit / copy 24. Abra a "Base Image" Selections / select all Selectione / modify / contract 42 px Edit / paste into selection Selections / select none 25. Abra o "Isa tube" - Apague a marca dágua Edit / copy Edit / paste as new layer na imagem Image / mirror Image / resize 95%, resize all layers desmarcado Posicione à direita, como no modelo Effects / 3D Drop shadow: 4 / 17 / 50 / 20,00 - preto 26. Assine e salve como Jpeg. https://vazsupsptutorials.weebly.com/vazsu-tutorial-247.html
| 


