| Twilight Steampunk 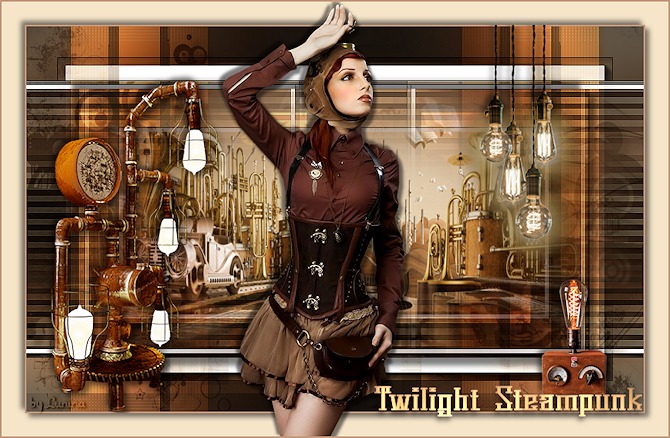
Obrigada Manuela por autorizar a tradução  Agradecimentos aos criadores dos tubes e dos materiais: tubes: K @ rine_dreams / Renee / tubes da internet masks Ildiko / Cas SelectionsMDesignTwilightSteampunk Plugins: Unlimited 2.0 RCS Filter Pak 1.0 - RCS Digi-Lens - Window Shades II [AFS IMPORT] - sqborder2 ** AAA Frames - Photo Frame MuRa's Seamless - Sharpen Toadies - What Are You? Material Aqui Coloque as seleções na pasta "Selections" Usando outros tubes e cores é possível ir testando o blend mode e a opacidade da layer, pois pode haver diferença no resultado do efeito pedido. Escolha 3 cores dos seus tubes Neste tutorial foram usadas as seguintes cores: 
Cor 1 #f6e5c9 / Cor 2 #c4987b / Cor 3 #ffc271 Abra uma imagem de 800 x 500 pixels, transparente Selections / Select all Abra o Backgroud Edit / Copy - Edit / Paste into selection Selections / Select none Adjust / Blur / Gaussian Blur: 20 Layers / New raster layer Pinte a layer com a cor 1 Abra a Mask Ildiko_Desings_Created @ Mask_r9 (21) minimize no Psp Layers / New Mask Layer / From Image Aplique a mask "Ildiko_Desings_Created @ Mask_r9 (21)" 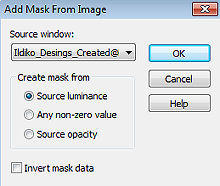
Layers/ Merge / Merge group Adjust / Sharpness / Sharpen Effects / 3D Effects / Drop Shadow: 10 / 10 / 50 / 10 - preto Effects / Image Effects / Offset: Horizontal 0 / Vertical 24 / Custom e Transparent marcados Ative a layer de fundo (Raster 1) Selections / Select all Selections / Modify / Contract / 40 Selections / Promote selection to layer Effects / Plugins / Unlimited 2.0 / RCS Filter Pak 1.0 / RCS Digi-Lens / Window ShadesII 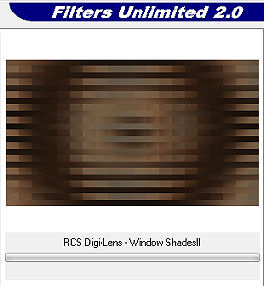
Effects / Plugins / AAA Frames / Photo Frame: 10 / 0 / 0 / 20 / 0 / 0 / 0 / 80 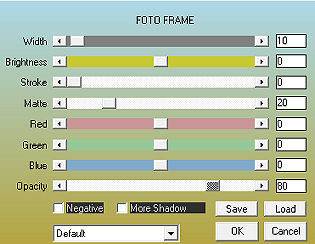
Selections / Modify / Contract / 30 Effects / Plugins / AAA Frames / Photo Frame: 5 / 0 / 0 / 5 / 0 / 0 / 0 / 100 
Selections / Promote selection to layer Selections / Select none Effects / Image Effects / Seamless Tiling / Settings Side by side Effects / Plugins / MuRa's Seamless / Sharpen: 130 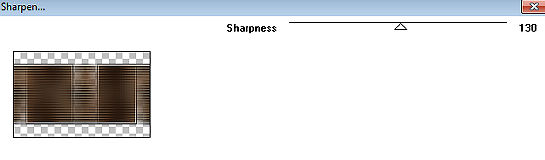
Ative a layer do topo (Group - Raster 2) Layers / New raster layer Selections / Select all Abra o fractal wallpaper Edit / Copy - Edit / Paste into selection Selections / Select none Abra a Mask cas_Mask_0415_15 minimize no Psp Layers / New Mask Layer / From Image aplique a "cas_Mask_0415_15" 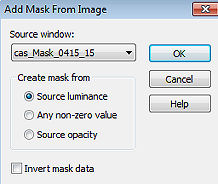
Layers / Merge / Merge group Layers / Arrange / Move Down Mude o blend mode da layer para Soft Light e baixe a opacidade para 80 Effects / 3D Effects / Drop Shadow: 10 / 10 / 50 / 10 - Preto Adjust / Sharpness / Sharpen Ative a layer do topo (Group - Raster 2) Mude o blend mode para Dodge e baixe a opacidade para 75 Layers / New raster layer Coloque no Foreground a cor 2 e no Background a cor 3 Forme no foreground o gradiente: Style Linear / Angle 0 / Repeats 0 / Invert desmarcado 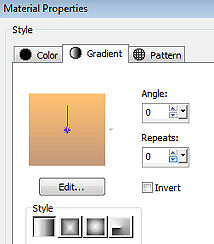
Selections / Load/save selection / Load selection from disk Aplique a seleção "SelectionsMDesignTwilightSteampunk" 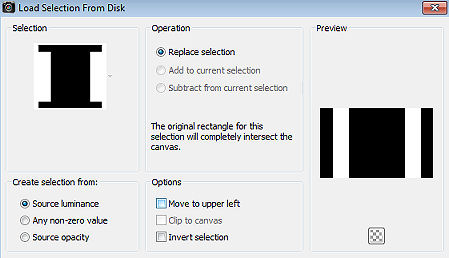
Pinte a seleção com o gradiente Selections / Select none Effects / Plugins / Unlimited 2.0 / [AFS IMPORT] / sqborder2 Altere só o primeiro valor para 134 e mantenha todos os outros valores Mude o blend mode da layer para Overlay Adjust / Sharpness / Sharpen Repita o Adjust / sharpen Effects / 3D Effects / Drop shadow: 5 / 5 / 50 / 10 - preto Repita com -5 / -5 / 50 / 10 Effects / Plugins / Toadies / What Are You? - default Layers / New raster layer Selections / Load/save selection / Load selection from disk Aplique a seleção "SelectionsMDesignTwilightSteampunk 1"
Abra o Renee_tubes_Musical-City ou o tube de sua escolha Edit / Copy - Edit / Paste into selection Effects: Plugins - AAA Frames - Photo Frame; 50 / 0 / 0 / 5 / 0 / 0 / 0 / 50 Effects / 3D Effects / Drop shadow: 10 / 10 / 50 / 10 - preto Repita com -10 / -10 / 50 / 10 Selections / Select none Image /Add borders / symmetric: 2 pixels com a cor 2 Abra o "tube lamps stelling" Edit / Copy - Edit / Paste as a new layer Effects / Image Effects / Offset: Horizontal -260 / Vertical -35 / Custom e Transparent marcados Adjust / Sharpness / Sharpen Effects / 3D Effects / Drop shadow: 5 / 5 / 50 / 10 - preto Repita com -5 / -5 / 50 / 10 Abra o "tube hanglampen" Edit / Copy - Edit / Paste as a new layer Effects / Image Effects / Offset: Horizontal 240 / Vertical 115 / Custom e Transparent marcados Adjust / Sharpness / Sharpen Effects / 3D Effects / Drop shadow: 5 / 5 / 50 / 10 - preto Repita com -5 / -5 / 50 / 10 Abra o "tube lamp" Edit / Copy - Edit / Paste as a new layer Effects / Image Effects / Offset: Horizontal 310 / Vertical -154 / Custom e Transparent marcados Adjust / Sharpness / Sharpen Effects / 3D Effects / Drop shadow: 5 / 5 / 50 / 10 - preto Repita com -5 / -5 / 50 / 10 Image / Add borders / symmetric: 30 pixels com a cor 1 Selections / Select all Selections / Modify / Contract 30 Effects / 3D Effects / Drop shadow: 5 / 5 / 50 / 10 - preto Repita com -5 / -5 / 50 / 10 Selections / Select none Abra o "Tube K @ rine_dreams_Lady_Streampunk_3305_Fevrier_2016" ou o tube de sua escolha Apague a marca dágua Edit / Copy - Edit / Paste as a new layer Image / Mirror Image / Resize 64%, resize all layers desmarcado Adjust / Sharpness / Sharpen Effects / 3D Effects / Drop Shadow: 5 / 5 / 50 / 5 - preto Repita com -5 / -5 / 50 / 5 Abra o "Tube WAMDesignTwilightSteampunk" Edit / Copy - Edit / Paste as a new layer Mova para a base à direita (veja no modelo final) Image / Add borders / symmetric: 2 pixels com a cor 2 Layers / New raster layer Assine Layers / Merge / Merge all layers https://maantje-psp-design.jouwweb.nl/seizoen-lessen/steampunk-halloween-gothic/twilight-steampunk
|  |
|


