Paint Colors 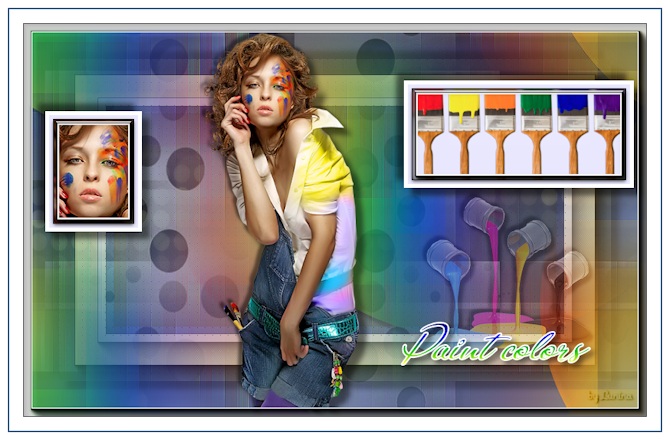
Obrigada Manuela (Maantje) por autorizar a tradução  Agradecimentos aos autores dos materais usados: Tubes Kahlan - Varie-OBG's - Paint cans (internet) Masks: MaskRi% 40186 - Masque1_Luz_Animabelle - Masque1_Sensuelle SelectionsMDesignPaintcolors Plugins: Unlimited 2.0 - Andrew's Filter Collection 56 - Bit Of A Mess ... *** MuRa's Seamless - Sharper Alien Skin - Eye Candy 5 Impact - Glass AAA Frames - Photo Frame AP 01 (Innovations) - Lines_SilverLining Material Aqui Coloque as seleções na pasta "Selections" do Psp Se usar outros tubes e cores é possível alterar o blend mode e a opacidade da layer porque pode dar diferença no resultado do efeito Escolha 4 cores de seus tubes Aqui foram escolhidas as seguintes cores: 
Cor 1 #e9e8fe / Cor 2 #e6db9c / Cor 3 #4f6185 / Cor 4 #ffffff Coloque no Foreground a cor 1 e no Background a cor 3 No Foreground forme o gradiente: Style Linear / Angle 0 / Repeats 0 / Invert desmarcado 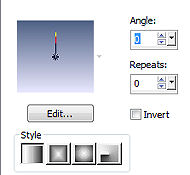
Abra uma imagem de 800 x 500 pixels, transparente Pinte a layer com o gradiente Layers / New raster layer Selections / Select all Abra o tube "Kahlan" ou o de sua escolha Edit / Copy - Edit / Paste into selection Selections / Select none Effects / Image Effects / Seamless Tiling / settings: Side by Side Adjust / Blur / Gaussian blur: 30 Effects / Plugins / Unlimited 2.0 / Andrew's Filter Collection 56 / Bit Of A Mess... / Default Layers / Duplicate Image / Flip Layers / merge / merge down Abra a mask “MaskRi% 40186” e minimize no Psp Layers / New mask layer / From image Appliqué a mask MaskRi% 40186, com Invert mask data marcado 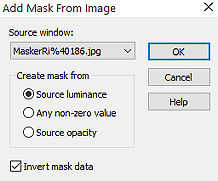
Layers / Merge / Merge group Effects / Plugins / MuRa's Seamless / Sharpen: setting: 245 Effects / 3D Effects / Drop Shadow: 10 / 10 / 50 / 10 - preto Layers / Duplicate Ative a layer abaixo (Group - Raster 2) Mude o blend mode da layer para Difference Ative a layer do topo (Copy of Group - Raster 2) Adjust / Sharpness / Sharpen Layers / New raster layer Pinte com a cor 2 Abra a mask “Masque1_Luz_Animabelle” e minimize no Psp Layers / New mask layer / From image Aplique a mask Masque1_Luz_Animabelle (Desmarque “Invert mask data”) 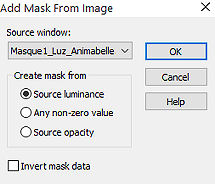
Layers / Merge / Merge group Effects / 3D Effects / Drop Shadow: 10 / 10 / 50 / 10 - preto Layers / Arrange / Move Down Ative a layer do topo (Copy of Group - Raster 2) Layers / New raster layer Selections / Select all Abra o tube “Varie_8_OBG” ou o de sua escolha Edit / Copy - Edit / Paste into selection Selections / Select none Effects / Image Effects / Seamless Tiling / Default Adjust / Blur / Radical Blur: Spin / 25% / Eliptical marcado / 0 / 0 / 0 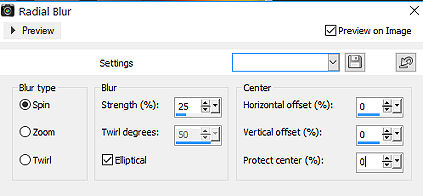
Layers / Duplicate Image / Flip Layers / merge / merge down Adjust / Blur / Gaussian blur: 35 Abra a mask “Masque1_Sensuelle” e minimize no Psp Layers / New mask layer / From image Appliqué a mask Masque1_Sensuelle 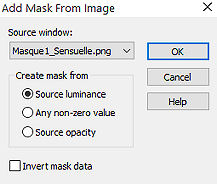
Layers / Merge / Merge group Adjust / Sharpness / Sharpen Effects / 3D Effects / Drop Shadow: 10 / 10 / 50 / 10 - preto Layers / New raster layer Pinte com a cor 3 Selections / Select all Effects / Plugins / AAA Frames / Foto Frame: 60 / 0 / 0 / 40 / 0 / 0 / 0 / 100 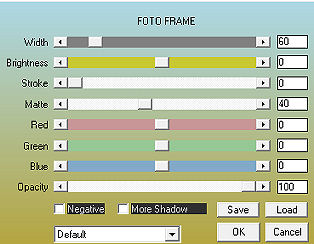
Selections / Select none Layers / arrange / move down Mude o blend mode par Hard Light e baixe a opacidade para 70 Adjust / Sharpness / Sharpen Layers/ New raster layer Pinte com a cor 2 Selections / Select all Effects / Plugins / AAA Frames / Foto Frame: 90 / 0 / 0 / 20 / 0 / 0 / 0 / 100 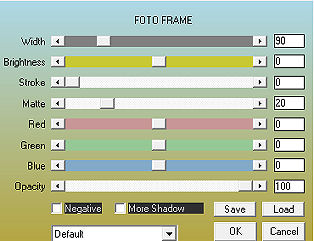
Selections / Modify / Contract: 40 Selections / Invert Aperte a tecla Delete Selections / Invert Effects / 3D Effects / Drop Shadow: 10 / 10 / 50 / 10 - preto Repita com -10 / -10 / 50 / 10 Selections / Select none Effects / Plugins / AP 01 (Innovations) / Lines_SilverLining: 10 / -1 / 10 / 0 / 0 / 0 - Dotty Grid 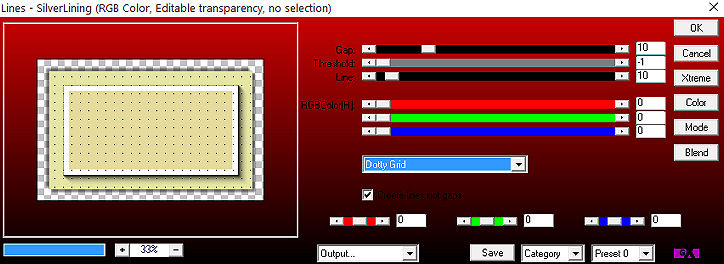
Mude o blend mode da layer para Multiply e baixe a opacidade para 50 Adjust / Sharpness / Sharpen Ative a layer do topo (Group - Raster 2) Layers / New raster layer Selections / Load/save selection / Load selection from disk Aplique a seleção “SelectionsMDesignPaintcolors” 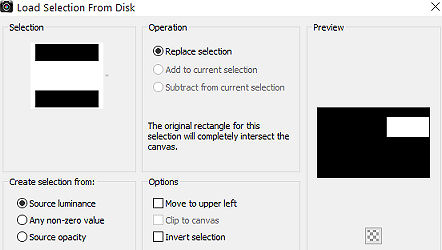
Pinte a seleção com a cor 4 Selections / Modify / Contract: 5 Pinte a seleção com a cor 1 Selections / Modify / Contract: 5 Abra o tube “Varie_5_OBG” ou o de sua escolha Edit / Copy - Edit / Paste into selection Effects / Plugins / AAA Frames / Foto Frame: 5 / 0 / 0 / 2 / 0 / 0 / 0 / 100 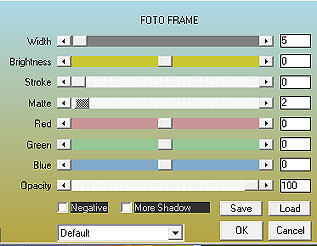
Effects / Plugins / Alien Skin / Eye Candy 5 Impact / Glass: Setting: Clear Selections / Select none Effects / 3D Effects / Drop Shadow: 10 / 10 / 50 / 10 - preto Repita com -10 / -10 / 50 / 10 Layers / New raster layer Selections: Load / save selection - Load selection from disk search SelectionsMDesignPaintcolors 1 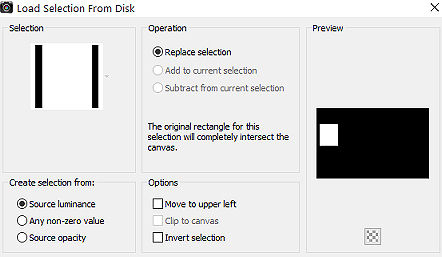
Pinte a seleção com a cor 4 Selections / Modify / Contract: 5 Pinte a seleção com a cor 1 Selections / Modify / Contract: 5 Abra o tube “Tube Kahlan” ou o de sua escolha Edit / Copy - Edit / Paste as a new layer Mova a cabeça do tube para dentro sa seleção Selections / Invert Aperte a tecla Delete Selections / Invert Effects / Plugins / AAA Frames / Foto Frame: 5 / 0 / 0 / 2 / 0 / 0 / 0 / 100 – como antes Effects / Plugins / Alien Skin / Eye Candy 5 Impact / Glass: Setting: Clear – como antes Selections / Select none Layers / Merge down Effects / 3D Effects / Drop Shadow: 10 / 10 / 50 / 10 - preto Repita com -10 / -10 / 50 / 10 Layers / Merge down Abra tube “Verfbussen” ou o de sua escolha Edit / Copy - Edit / Paste as a new layer Se usar seu próprio tube mude o blend mode para Soft Light Effects / 3D Effects / Drop Shadow: 5 / 5 / 50 / 5 – preto Repita com -5 / -5 / 50 / 5 Adjust / Sharpness / Sharpen Mova para a direita, como no modelo final Abra o tube feminimo Kahlan ou o de sua escolha Edit / Copy - Edit / Paste as a new layer Image / Resize: 72%, resize all layers desmarcado Mova o tube ligeiramente para a esquerda Effects / 3D Effects / Drop Shadow: 10 / 10 / 50 / 10 - preto Repita com -5 / -5 / 50 / 5 Abra o tube “WAMDesignPaintcolors” Edit / Copy - Edit / Paste as a new layer Posicione a seu gosto no trabalho Image / Add borders / symmetric: 25 pixels com a cor 4 2 pixels com a cor 3 Selections / Select all Selections / Modify / Contract: 20 Effects / Plugins / AAA Frames / Foto Frame: 10 / 0 / 0 / 1 / 0 / 0 / 0 / 100 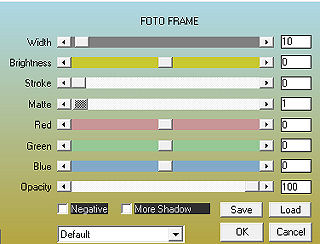
Selections / Select none Image / Add borders / symmetric: 10 pixels na cor 4 Layers / New raster layer Assine Layers: Merge - Merge all layers https://maantje-psp-design.jouwweb.nl/paint-colors | 
 AimooHelpForum
Aimoo Forum List |
Ticket |
Today |
Member |
Search |
Who's On |
Chat Room | Photos | Help |
Sign In |
AimooHelpForum
Aimoo Forum List |
Ticket |
Today |
Member |
Search |
Who's On |
Chat Room | Photos | Help |
Sign In |
 |
|


