| Hands before Eyes 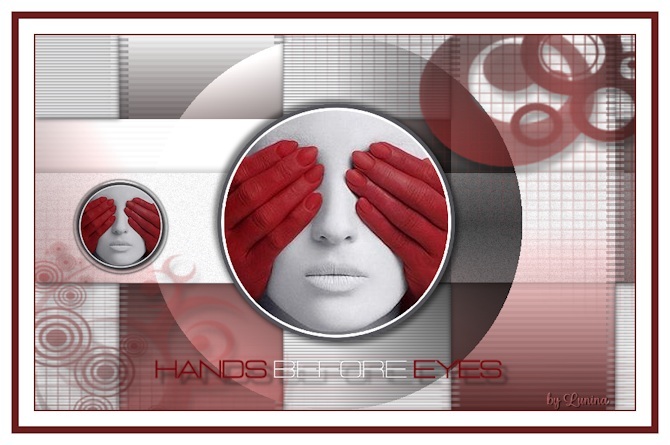
Obrigada Manuela por autorizar a tradução  Material Aqui Agradecimentos aos Tubers pelos materiais: Tube Yoka-Face-RedHands-27718 Mask MaskRi%40109 Selections SelectionMDesign 105 Hands before Eyes Wordart WAMDesign Hands before Eyes Plugins: Filters Unlimited 2.0 / Unlimited 2.0 - VM 1 - Color Fusion Unlimited 2.0 / VM 1 - Web Weaver Unlimited 2.0 / Render - ButtonMaker Round Corolaine and Sensibility - CS HLines Alien Skin Eye Candy 5 Impact - Glass Graphic Plus – Cross Shadow Preset MDesign Hands before Eyes Coloque as seleções na pasta "Selections" Dê 2 cliques no preset para importá-lo ao plugin correspondente Está usando outras cores e tubes? Então é possível ter que alterar o blend mode e a opacidade da layer porque o efeito final pode resultar diferente Escolha 4 cores de seus tubes  Cor 1 #e4e3e8 / Cor 2 #55545a / Cor 3 #6a1e1e / Cor 4 #ffffff Coloque no Foreground a cor 1 e no Background a cor 2 No foreground forme o gradiente Style Linear / Angle 0 / Repeats 0 / Invert desmarcado 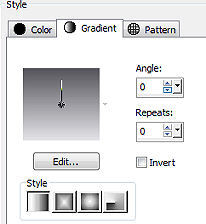
Abra uma imagem de 800 x 500 - Transparente Pinte a layer com o gradiente Effects / Plugins / Unlimited 2.0 / VM 1 / Color Fusion 112 / 118 / 0 
Coloque no Foreground a cor 3 e no Background a cor 4 No foreground forme o gradiente Style Linear / Angle 0 / Repeats 0 / Invert desmarcado 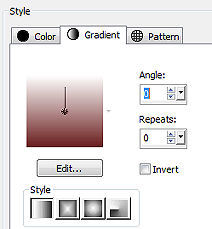
Layers / New Raster Layer Pinte a layer com o gradiente Effects / Plugins / Unlimited 2.0 / VM 1 / Web Weaver 226 / 127 / 20 / 0 / 0 / 135 / 115 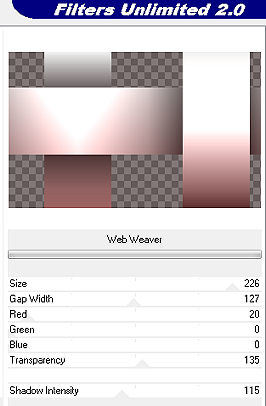
Selections / Load/Save Selection / Load Selection from Disk aplique a seleção "SelectionMDesign 105 Hands before Eyes" 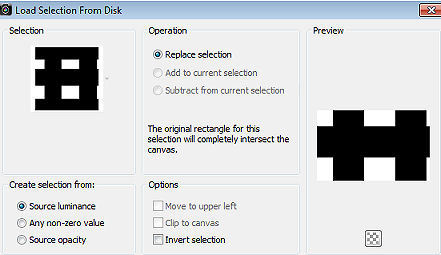
Aperte a tecla Delete Selections / Invert Effects / 3D effects / Drop shadow: 0 / 0 / 50 / 10 - preto Repita o drop shadow Selections / Select none Layers / Duplicate Ative a layer abaixo (Raster 2) Effects / Plugins / Corolaine and Sensibility / CS-HLines 4 / 4 / 10 Ative a layer do topo (Copy of Raster 2) Effects / Plugins / Unlimited 2.0 / Render - ButtonMaker Round 170 / 0 / 0 / 160 
Selections / Load/Save Selection / Load Selection from Disk aplique a seleção "SelectionMDesign 105 Hands before Eyes" 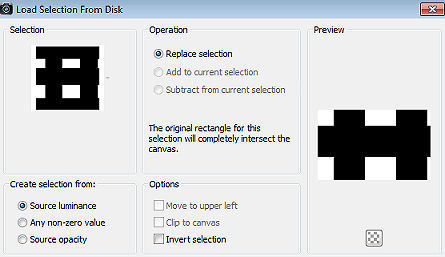
Selections / Promote Selection to layer Effects / Texture Effects / Blinds Width 4 / Opacity 50 / Cor 2 / Horizontal marcado 
Effects / 3D effects / Drop shadow: 0 / 0 / 50 / 10 - preto Selections / Select none Layers / New Raster Layer Selections / Load/Save Selection / Load Selection from Disk aplique a seleção "SelectionMDesign 105 Hands before Eyes 1" 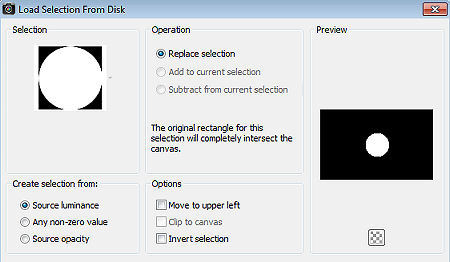
Pinte a seleção com a cor 2 Selections / Select none Effects / Distortion Effects / Warp Horizontal - Vertical 0 / Size 52 / Strength 52 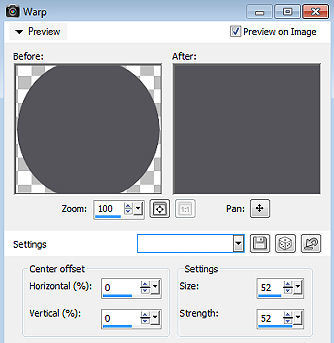
Selections / Select all Selections / Float Selections / Modify / Contract 7 Abra o tube feminino que está no material / ou seu próprio tube Edit / Copy – Edit / Paste as New Layer Mova parte do tube para dentro da seleção Pode preencher todo o círculo com o tube Selections / Invert Aperte a tecla Delete Selections / Invert Selections / Select none Layers / merge / merge down Selections / Select all Selections / Float Selections / Modify / Contract 7 Selections / Modify / Select Selection Borders Both sides / Border width 2 / Anti alias marcado 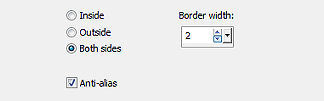
Pinte a seleção com a cor 4 Selections / Select none Effects / 3D effects / Drop shadow: 5 / 5 / 50 / 10 - preto Repita com -5 / -5 / 50 / 10 - preto Layers / Duplicate Image / Resize em 60% - resize all layers desmarcado Repita o resize em 60% Adjust / Sharpness / Sharpen Selections / Select all Selections / Float Selections / Defloat Effects / Plugins / Alien Skin Eye Candy 5 Impact / Glass Aplique o Setting "MDesign Hands before Eyes" ATENÇÃO: Esse preset pode aparecer como Les 105 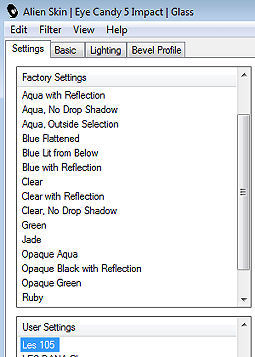
Caso haja algum problema a configuração pode ser feita manualmente conforme abaixo 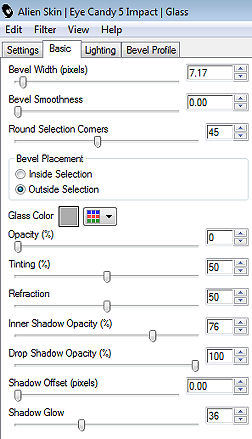
Selections / Select none Effects / Image Effects / Offset Horizontal -287 / Vertical -5 / Custom e Transparent marcados Layers / New Raster Layer Selections / Load/Save Selection / Load Selection from Disk aplique s seleção "SelectionMDesign 105 Hands before Eyes 2" 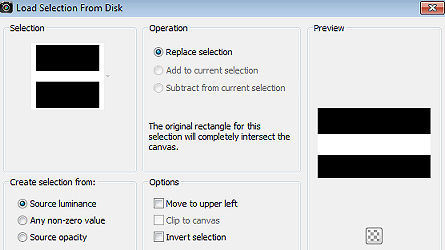
Pinte a seleção com a cor 1 Selections / Select none Baixe a opacidade da layer para 30 Adjust / Add / Remove Noise / Add Noise 30% / Gaussian / Monochrome marcado 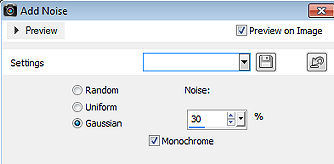
Layers / Arrange / Move Down Repita o Move Down Effects / 3D effects / Drop shadow: 5 / 5 / 50 / 10 - preto Repita com -5 / -5 / 50 / 10 - preto Layers / New Raster Layer Pinte a layer com a cor 3 Effects / Plugins / Graphic Plus / Cross Shadow / Default Abra a mask "MaskRi%40109" e minimize no Psp Layers / New Mask Layer / From Image aplique a mask MaskRi%40109 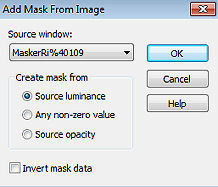
Layers / Merge / Merge Group Effects / 3D effects / Drop shadow: 10 / 5 / 50 / 10 - preto Adjust / Sharpness / Sharpen Ative a layer do topo (Copy of Raster 3) Abra o tube WAMDesign Hands before Eyes Edit / Copy – Edit / Paste as New Layer Effects / Image Effects / Offset Horizontal 0 / Vertical -205 / Custom e Transparent marcados Image / Add Borders / symmetric: 2 pixels na cor 3 20 pixels na cor 4 10 pixels na cor 3 15 pixels na cor 4 Layers / New Raster Layer Assine Layers / Merge / Merge All Layers https://maantje-psp-design.jouwweb.nl/hands-before-eyes |  |
|


