Amy  Obrigada Maantje por autorizar a tradução
 Material Aqui
Tube de Crealine (não vem no material)
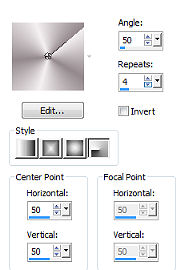
Masks: Narah (2) Narah_mask_0563 Selection selection MDesign Amy Word Art MDesign WA Plugins: RCS Filter Pack 1.0 / RCS Digi / Lens / Bubble Pack FM Tile Tools / Blend Emboss MuRa Meister / Perspective Tiling 1.1 & <BKG Designer sf 10 11> / Downstairs Vizros 4 / Box AAA Filters / Photo Frame Coloque a seleção na pasta de seleções do Psp Escolha uma cor clara do tube para o foreground e outra escura para o background Use suas próprias cores e escolha o blend mode e a opacidade que mais se adequarem ao seu trabalho No foreground forme o gradiente Style Radial: Angle 50 / Repeats 4 / Invert demarcado Center point e Focal point ambos em 50
 Abra uma imagem de 750 x 500px transparente
Pinte com o gradiente
Adjust / Blur / Gaussian blur / Radius 25
Effects / Plugins / Unlimited 2.0 / RCS Filter Pack 1.0 / RCS Digi - Lens Bubble Pack / Default

Adjust / Sharpness / Sharpen more Volte o foreground para cor
Layers / New raster layer
Pinte com a cor do background Abra a mask Narah (2) e minimize no Psp
Layers / New mask layer / From image / localize a mask Narah (2)

Layers / Merge / Merge group
Effects / 3D effects / Drop shadow: 5 / 5 / 100 / 5,00 - branco
Effects / Image effects / Seamless tiling / Setting: Side by side

Mude o blend mode para Overlay Layers / New raster layer
Pinte com a cor do background
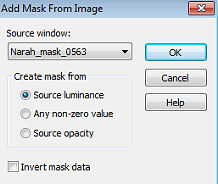
Abra a mask Narah_mask_0563
Minimize no Psp
Layers / New mask layer / From image - localize a mask Narah_mask_0563
Layers / Merge / Merge group
Effects / 3D effects / Drop shadow: 10 / 10 / 50 / 5,00 - preto
Effects / Plugins / FM Tile Tools / Blend Emboss / Default
Mude o blend mode para Screen Layers / Duplicate
Mude o blend mode para Lighten Ative a layer de fundo (Raster 1)
Selections / Load/save selection / Load selection from disk - aplique a selection MDesign Amy

Selections / Promote selection to layer
Layers / Arrange / Bring to top
Selections / Select none
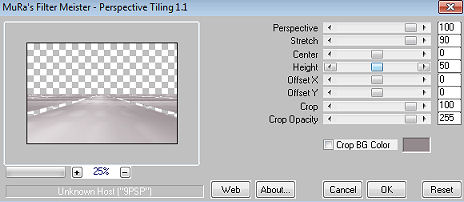
Effects / Plugins / MuRa Meister / Perspective Tiling 1.1: 100 / 90 / 0 / 50 / 0 / 0 / 100 / 255
Adjust /Sharpness / Sharpen
Effects / Image effects / Offset: Horizontal offset: 0 / Vertical offset: -160 / Custom e Transparent marcados
Effects / 3D effects / Drop shadow: 10 / 10 / 50 / 10,00 - preto
Layers / Arrange / Move down - 2 vezes Ative a layer do topo
Abra o tube Alies 110-bloemen-herfsttak-09092009
Edit / Copy
Edit / Paste as a new layer
Effects / Image effects / Offset: Horizontal offset: 210 / Vertical offset: 20 / Custom e Transparent marcados
Mude o blend mode para Luminance(Legacy) e baixe a opacidade para 25
Layers / Arrange / Move down - 2 vezes
Effects / 3D effects / Drop shadow: 10 / 10 / 50 / 10,00 - preto Ative a layer de fundo (Raster 1)
Selections / Load/save selection / Load selection from disk - aplique a selection MDesign Amy novamente
Selections / Promote selection to layer
Layers / Arrange / Bring to top
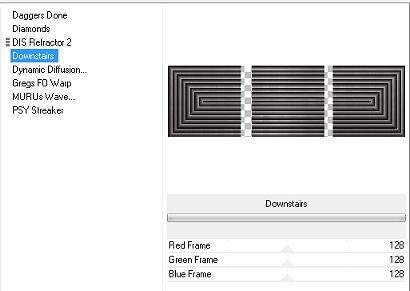
Effects / Plugins / Unlimited 2.0 / & <BKG Designer sf 10 11> / Downstairs / Default
Mude o blend mode para Luminance(Legacy) e baixe a opacidade para 90
Effects / 3D effects / Drop shadow: 10 / 10 / 50 / 10,00 - preto
Selections / Select none
Layers / Merge / Merge visible No foreground forme o gradiente Style Rectangular: Angle 0 / Repeat 0 / Invert desmarcado / Center point e Focal point em 50

Layers / New raster layer
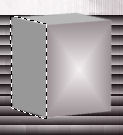
Obs.: O box (caixa) está incluida nos materiais caso haja problema com o plugin Vizros 4 Se usar o box do material: Free rotate 90 / Right marcado / Nada mais Effects / Plugins / Vizros 4 - Box: Positions: Top Right / X 123 - Y 134 - Z 164 View Angle: H 60 - V 10 - 3D 85 - Size 55 Light Source: 80 - 65 - 86 / X page marcado / Image Opaque: 255

A imagem estará em branco com o box nele
Ative a varinha mágica / Mode: Add / Tuning Mode: RGB Value / Tolerance 0 / Contiguous marcado / Feather: 1 / Anti alias marcado / Outside
 Clique na área branca. Aperte a tecla Delete
Selections / Select none
Com a varinha mágica, clique na frente do box

Pinte com o gradiente rectangular
Selections / Select none Com a varinha mágica clique agora na lateral esquerda.
Pinte com o gradiente
Selections / Select none Novamente com a varinha mágica, clique na parte de cima do box.

Pinte com a cor do foreground ou do background. Veja o que fica melhor
Selections / Select none Effects / 3D effects / Drop shadow: 2 / 2 / 50 / 5,00 - preto Repita com H e V= -2 Posicione o box à esquerda como no modelo
Layers / Duplicate
Image / Resize em 75%, resize all layers desmarcado
Coloque em frente ao outro, como no modelo Abra o tube calguisdecorfloral21102011
Edit / Copy
Edit / Paste as a new layer
Image / Mirror
Image / Resize em 50%
Resize novamente em 80%, resize all layers desmarcado
Adjust / Sharpness / Sharpen
Effects / 3D effects / Drop shadow: 5 / 5 / 50 / 5, 00 - preto Repita com H e V= -5
Effects / Plugins / FM Tile Tools / Blend Emboss / Default
Coloque sobre o box maior
Layers / Duplicate
Image / Resize em 90%, resize all layers desmarcado
Coloque sobre o box menor Abra seu tube
Edit / Copy
Edit / Paste as a new layer
Image / Resize em 80%, resize all layers desmarcado (Depende do tamanho do tube escolhido)
Effects / 3D effects / Drop shadow: 10 / 10 / 50 / 10,00 - preto Repita com H e V= -10
Posicione Abra o wordart MDesign WA Amy
Edit / Copy
Edit / Paste as a new layer
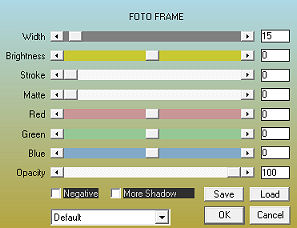
Posicione Assine Image: Add borders (symmetric) 2 px com a cor branca 2 px com a cor do background 2 px com a cor do foreground 25 px com a cor branca 2 px com a cor do background 2 px com a cor do foreground 2 px com a cor branca Effects / Plugins / AAA Filters / Photo Frame: mude só Width para 15
Salve como Jpeg |  |
|


