Ruth 
Obrigada Animabelle por autorizar a tradução  Material Aqui Este tutorial é uma criação pessoal de Animabelle Qualquer semelhança com outro é mera coincidência Plugins: MuRa's Meister
Mehdi
AP [Lines]
Filters Unlimited 2.0
Filtre personnalisé
VanderLee
Alien Skin Eye Candy 5: Impact
Graphics Plus
L & K Landsiteofwonders
AAA Frame 1. Abra todo material necessário no PSP Duplique-o e feche os originais 2. Escolha 3 belas cores de seus tubes, imagens, misteds... Para este tutorial foram escolhidas as seguintes cores  Cor 1 f6d4bd / Cor 2 #81523e / Cor 3 #50210c Fique à vontade para alterar o blend mode e a opacidade da layer, se necessário 3. Abra uma imagem transparente de 800 x 500 pixels Coloque no foregroud a cor 1 e no background a cor 2 Effects / Plugins / MuRa's Meister / Cloud 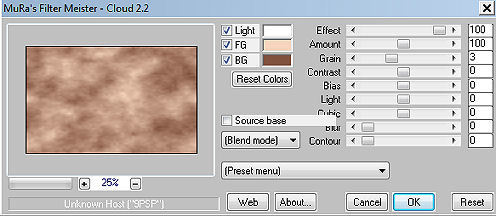
4. Effects / Plugins / Mehdi / Sorting Tiles: Block Range 150-300 / Block 265 / Diamonds-Up marcados 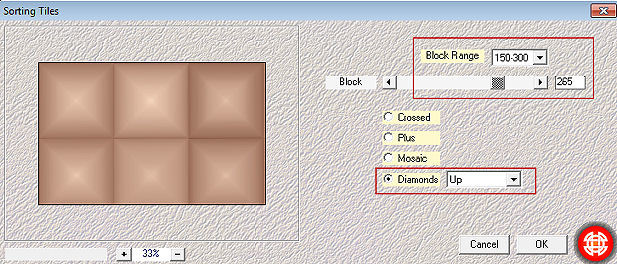
Effects / Plugins / Mehdi / Sorting Tiles Block Range 150-300 / Block 265 / Plus marcados 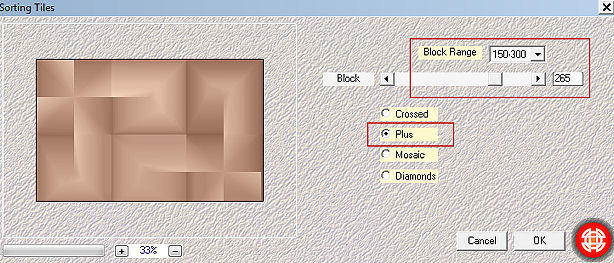
5. Ative a ferramenta Selection / Custom Selection:
Top 0 / Left 0 / Right 266 / Bottom 500 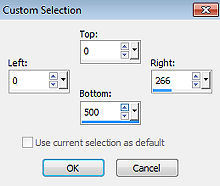
Selections / Promote Selection to Layer Selections / Select None 6. Effects / Plugins / AP [Lines] / Lines - SilverLining: 20 / -1 / 10 / 0 / 0 / 0 - GridPaper 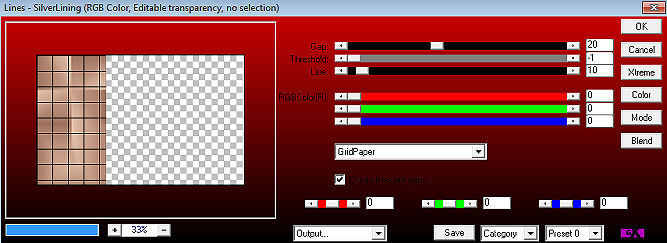
Effects / Image Effect / Seamless Tiling 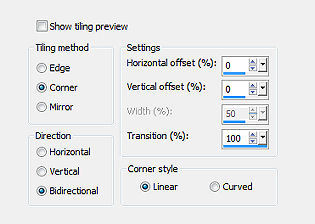
Mude o blend mode da layer para "Hard Light" - Baixe a opacidade para 70 7. Ative a layer abaixo "Raster 1" Ative a ferramenta Selection / Custom Selection:
Top 0 / Left 265 / Right 266 / Bottom 500 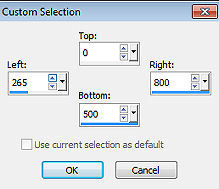
Selections / Promote Selection to Layer 8. Mantenha a seleção ativa Effects / Plugins / Filters Unlimited 2.0 / &<Background Designers IV> / sf10 Slice N Dice  Mantenha a seleção ativa 9. Layers / Duplicate Effects / Plugins / Filters Unlimited 2.0 / kang 1 / busy Circuits (Settings em Default) 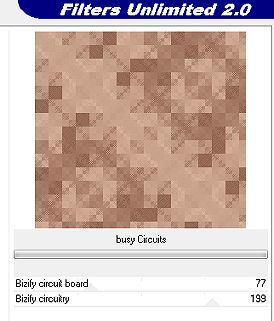
Baixe a opacidade da layer para 60 10. Effects / User Defined Filter / Emboss_3 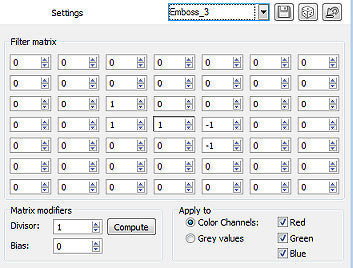
Layers / Merge / Merge down Selections / Select None Effects / Image Effect / Seamless Tiling - como antes Layers / Merge Visible Layers 11. Layers / Duplicate Effects / Plugins / Filters Unlimited 2.0 / Filter Factory Gallery C / Heightline (Settings em Default) 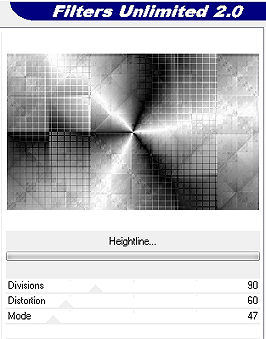 Mude o blend mode da layer para "Overlay" - Baixe a opacidade para 60 12. Layers / New Raster Layer Selections / Select All Copie cole na seleção o tube principal "5520-luzcristina" Selections / Select None Effects / Plugins / Filters Unlimited 2.0 / Simple / Pizza Slice Mirror 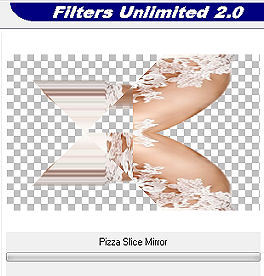
13. Effects / Plugins / VanderLee / UnPlugged-X / Defocus 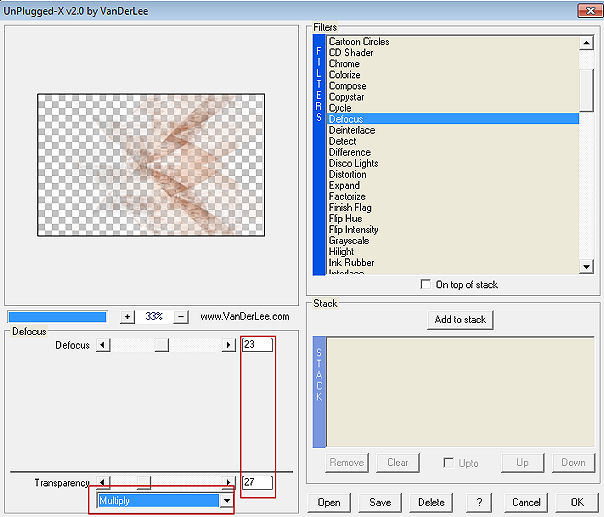
Mude o blend mode da layer para "Overlay" - Baixe a opacidade para 80 Effects / 3D Effect / Drop Shadow: 5 / 5 / 100 / 5 / Preto 14. Layers / New Raster Layer Pinte a layer com a cor 1 Layers / New Mask Layer / From Image Aplique a mask "Mask1_Ruth_Animabelle"  Layers / Merge / Merge Group 15. Selections / Load/Save Selection / Load selection from Disk Aplique a seleção "Sel1_Ruth_Animabelle" 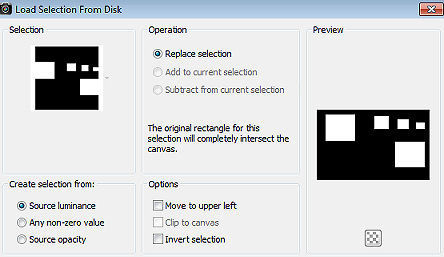
Layers / New Raster Layer Pinte a seleção com a cor 2 Selections / Modify / Contract / 5 pixels 16. Copie e cole na seleção a imagem "Paysage_Ruth_Animabelle" Effects / Plugins / Alien Skin Eye Candy 5: Impact Aplique o Settings "Glass1_Animabelle" 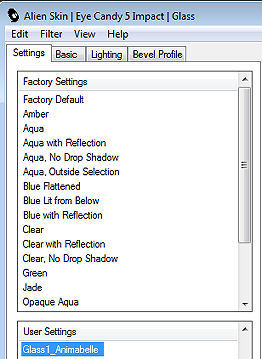
Selections / Select None Layers / Merge / Merge down Effects / 3D Effect / Drop Shadow: 0 / 0 / 100 / 30 / Cor 3 Layers / Merge Visible Layers 17. Edit / Copy ou Window Duplicate (salve para depois) Image / Add borders / symmetric / 1 pixel, cor 3 Selections / Select All Image / Add borders / symmetric / 30 pixels, cor 1 Selections / Invert Edit / Paste into selection Adjust / Blur / Gaussian Blur / Radius em 15 18. Selections / Promote Selection to Layer Effects / Plugins / Graphics Plus / Cross Shadow 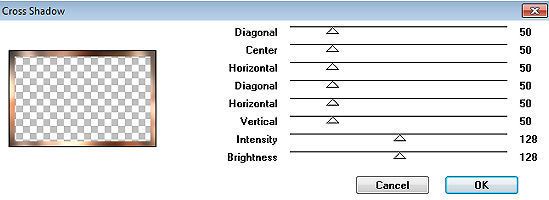
Mude o blend mode da layer para "Luminance Legacy" Layers / Merge / Merge down 19. Effects / Plugins / L & K Landsiteofwonders / L & K Paris 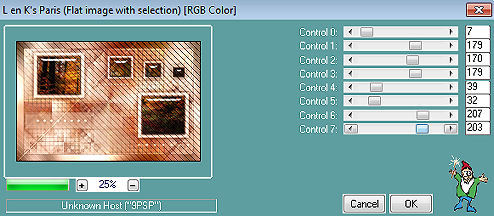
Selections / Invert Effects / 3D Effect / Drop Shadow: 0 / 0 / 100 / 50 / Cor 3 Repita o drop shadow Selections / Select None 20. Image / Add borders / symmetric / 1 pixel, cor 3 Selections / Select All Image / Add borders / symmetric / 60 pixels, cor 1 Selections / Invert Copie e cole na seleção a imagem duplicada no item 17 Adjust / Blur / Gaussian Blur / Radius em 15 21. Selections / Promote Selection to Layer Effects / Plugins / Filters Unlimited 2.0 / ScreenWorks / Grid Layout 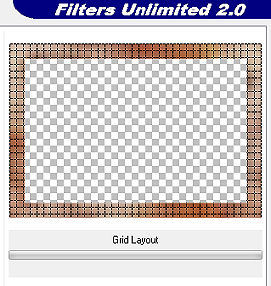
Baixe a opacidade da layer para 26 Layers / Merge / Merge down Selections / Invert Effects / 3D Effects / Drop Shadow: 0 / 0 / 100 / 80 / Cor 3 22. Selections / Invert novamente Selections / Promote Selection to Layer Selections / Select None Image / Mirror Layers / Merge / Merge Visible Layers Effects / Plugins / AAA Frame / Foto Frame 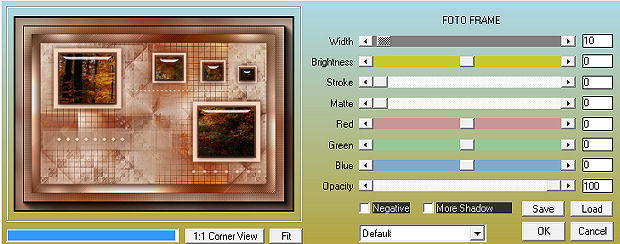 23. Copie e cole como nova layer o tube principal "5520-luzcristina" Image / Resize em 85% (Resize all layers desmarcado) Adjust / Sharpness / Sharpness Pocicione o tube no centro da tag (veja modelo final) 24. Layers / Duplicate Ative a layer abaixo Adjust / Blur / Gaussian Blur / Radius em 20 Mude o blend mode da layer para "Multiply" Layers / Merge All (Flatten) IMPORTANTE: Resize a imagem para 900 px widht se desejar enviar sua versão à Animabelle 25. Layers / New Raster Layer Assine Layers / Merge / All (flatten) File / Export / JPEG Optimizer http://animabelle.free.fr/Tutoriels_Animabelle/Page7/Ruth/Ruth.htm
|  |
|


