Renee 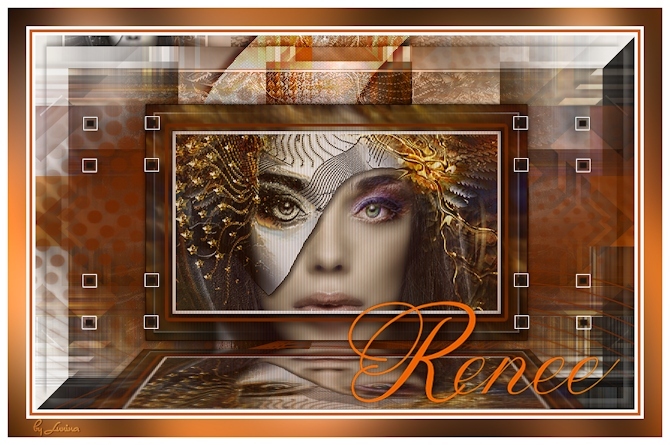
Obrigada Manuela por autorizar a tradução  Material Aqui Agradecimentos aos Tubers pelos materiais: Tube Renee Masks maskcamerontags_indieII6 Narahmask Selections SelectionMDesign Renee Wordart WAMDesign Renee Deco Preset Renee perspective shadow Plugins: Filters Unlimited 2.0 – VM1 - Web Weaver ScreenWorks - Pin Hole (may also be under filters) Toadies–Weaver Toadies - *Sucking Toad* Order II.2 Graphic Plus – Cross Shadow AAA Frames - Photo Frame Alien Skin Eye Candy 5 Impact - perspective shadow Coloque as seleções na pasta "Selections" Dê 2 cliques para importar o Setting Renee perspective shadow ao plugin correspondente Está usando outras cores e tubes? Então é possível ter que alterar o blend mode e a opacidade da layer porque o efeito final pode resultar diferente Escolha 3 cores de seus tubes Neste tutorial foram usadas as seguintes cores: Cor 1 #cd5c00 / Cor 2 #6f2701 / Cor 3 #ffffff  Coloque no Foreground a cor 1 e no Background a cor 2 Pelo Foreground forme o Gradiente Style Radial / Angle 90 / Repeats 4 / Center Point 50 e 50 
Abra uma imagem de 800 x 500 pixels, Transparente Pinte a imagem com o gradiente Adjust / Blur / Radical Blur: Zoom / Strength 70 / Eliptical desmarcado / 0 / 100 / 0 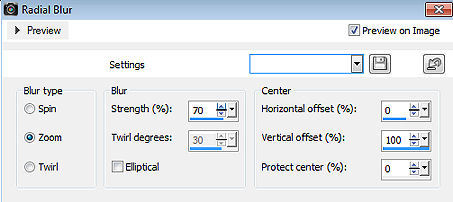
Layers / New raster layer Selections / Select all Abra o tube feminino de sua escolha / ou o tube feminino que está no material Edit / Copy – Edit / Paste into selection Selections / Select none Effects / Image Effects / Seamless Tiling: Angle / Bidirectional / Transition 100 % / Curved 
Effects / Plugins / Toadies / Weaver / Default Effects / Plugins / Toadies / *Sucking Toad* Bevel II.2: 45 / 33 /33 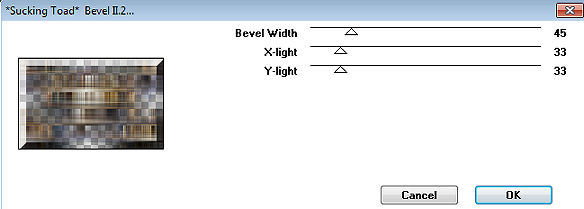
Ative a layer abaixo Selections / Load/save selection / Load selection from disk Aplique a seleção "SelectionMDesign Renee" 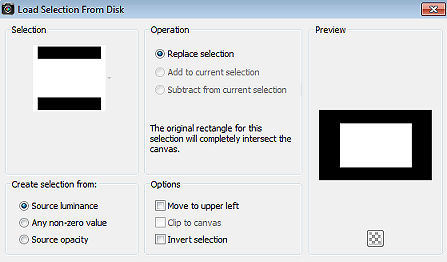
Selections / Promote Selection to layer Layers / Arrange / Bring to top Effects / Plugins / Graphic Plus / Cross Shadow / Default Effects / Plugins / AAA Frames / Photo Frame: 10 / 0 / 0 / 2 / 0 / 0 / 0 / 100 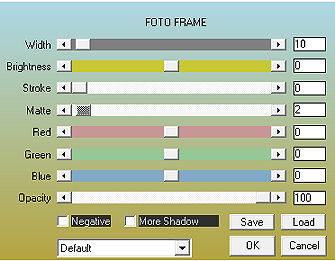
Effects / 3D effects / Drop shadow: 0 / 0 / 50 / 10 - preto Repita o drop shadow Selections / Select none Ative a layer abaixo Layers / New raster layer / Pinte a layer com a cor 3 Abra a Mask maskcamerontags_indieII6 e minimize no Psp Layers / New Mask Layer / From Image Aplque a Mask maskcamerontags_indieII6 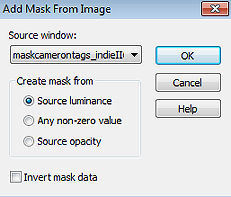
Layers / Merge / Merge Group Adjust / Sharpness / Sharpen Effects / 3D effects / Drop shadow: 5 / 5 / 50 / 5 - preto Repita com -5 / -5 / 50 / 5 Mude o blend mode da layer para Overlay Baixe a opacidade da layer para 50 Selections / Select all Abra o tube feminino escolhido / ou o do material Edit / Copy – Edit / Paste as new layer Selections / Modify / Contract em 15 Effects / Plugins / AAA Frames / Photo Frame: 30 / 40 / 0 / 3 / 0 / 0 / 0 / 100 
Effects / 3D effects / Drop shadow: 5 / 5 / 50 / 10 - preto Repita com -5 / -5 / 50 / 10 Mude o blend mode da layer para Multiply e baixe a opacidade para 90 Adjust / Sharpness / Sharpen Effects / Plugins / Unlimited 2.0 / VM1 / Web Weaver: 85 / 195 / 0 / 0 / 0 / 24 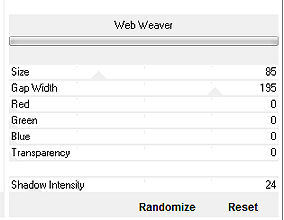
Selections / Load/save selection / Load selection from disk Aplique a seleção "SelectionMDesign Renee 1" 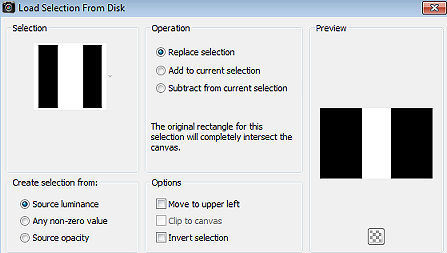
Selections / Promote Selection to layer Adjust / Blur / Gaussian Blur / Radius: 50 Effects / Edge Effects / Enhance Selections / Select none Effects / Distortion Effects / Wave: Horizontal 10 / 100 / Transparent 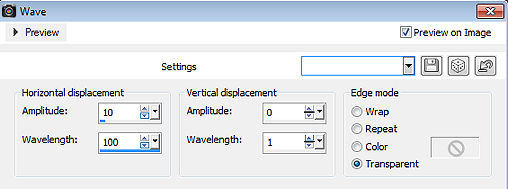
Effects / 3D effects / Drop shadow: 5 / 5 / 50 / 10 - preto Repita com -5 / -5 / 50 / 10 Effects / Plugins / Unlimited 2.0 / ScreenWorks / Pin Hole Mude o blend mode da layer para Overlay Effects / Edge Effects / Enhance more Layers / New raster layer - Pinte a layer com a cor 2 Abra a Mask "narahmask abstract63" e minimize no Psp Layers / New Mask Layer / From Image Aplique a mask "narahmask abstract63" 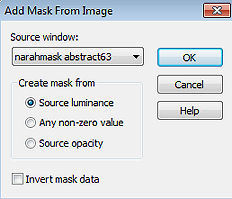
Layers / Merge / Merge Group Adjust / Sharpness / Sharpen Effects / 3D effects / Drop shadow: 5 / 5 / 50 / 10 - preto Repita com -5 / -5 / 50 / 10 Ative a layer do topo Selections / Load/save selection / Load selection from disk Aplique novamente a seleção "SelectionMDesign Renee"
Abra o tube feminino escolhido / ou o do material Edit / Copy – Edit / Paste as new layer Selections / Invert Aperte a tecla Delete Selections / Invert Effects / Plugins / AAA Frames / Photo Frame: 35 / 0 / 0 / 4 / 0 / 0 / 0 / 100 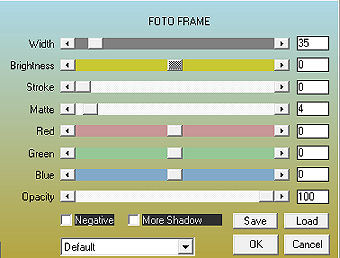
Selections / Modify / Contract em 30 Selections / Modify / Select Selection / Outside / Border width 4 / Anti alias marcado Pinte a seleção com a cor 2 Effects / 3D effects / Drop shadow: 5 / 5 / 50 / 10 - preto Repita com -5 / -5 / 50 / 10 Selections / Select none Layers / merge / merge down Effects / Plugins / Alien Skin Eye Candy 5 Impact / perspective shadow: Aplique o setting "Renee perspective shadow" Se não funcionar Aplique o Settings: Reflect in front / Sharp e empurre um pouco para cima posicionando o cursor do mouse no ponto central 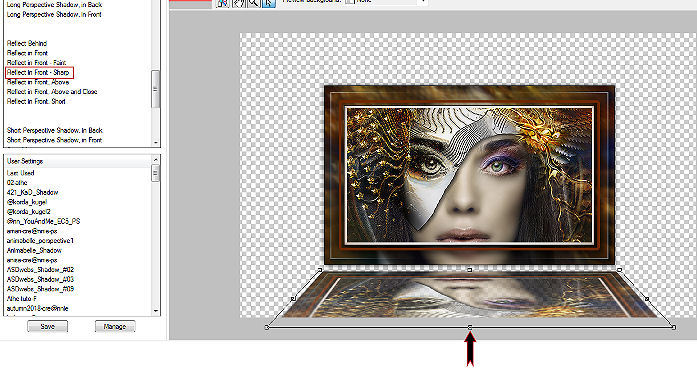
Effects / Texture Effects / Blinds: Width 2 / Opacity 35 / Light from top left marcado / cor 2 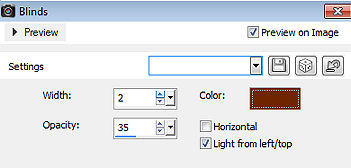
Abra o tube Deco Edit / Copy – Edit / Paste as new layer Effects / Image Effects / Offset: Horizontal Offset 2 / Vertical Offset -55 / Custom e Transparent Marcados Adjust / Sharpness / Sharpen Image / Add borders / symmetric marcado: 4 pixels na cor 3 4 pixels na cor 1 4 pixels na cor 3 Coloque no Foreground a cor 1 e no Background a cor 2 Passe o foreground para Gradient e configure: Style Radial / Angle 90 / Repeats 4 / Center Point, ambos em 50 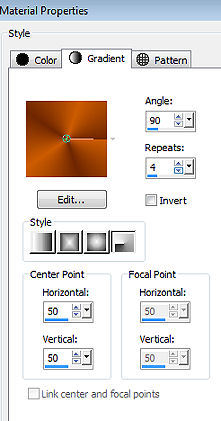
Image / Add borders / symmetric marcado: 25 pixels na co preta Ative a ferramenta varinha mágica e clique nessa borda preta Pinte a seleção com o gradiente Adjust / Blur / Gaussian Blur / Radius 40 Effects / Plugins / Graphic Plus / Cross Shadow / Default Selections / Select none Image / Add borders / symmetric marcado: 10 pixels na cor 3 Abra o tube WAMDesign Renee Edit / Copy – Edit / Paste as new layer Mova-o para a base à direita como no modelo final Layers / New raster layer Assine Layers / Merge / Merge All Layers https://maantje-psp-design.jouwweb.nl/renee |  |
|


