| Pureté 
Obrigada Animabelle por autorizar a tradução  Este tutorial é uma criação pessoal de Animabelle Qualquer semelhança com outro é mera coincidência Material Aqui Plugins: I.C.NET Software / Filters Unlimited 2.0
Simple
Alien Skin Eye Candy 5: Impact
User Defined Filter IMPORTANT Coloque as seleções na pasta "Selections" do PSP Abra todas as imagens no PSP incluindo as masks. Duplique todos e feche os originais Cores: 
#6d6d6b / #813128 / #e0dde4 Realização Etapa 1 Abra uma imagem transparente de 900 x 600 pixels Pinte a imagem com o gradiente: Style radial / Angle 0 / Repeats 5 / Invert desmarcado, utilizando as cores 1 / 3 / 2 / 3 / 1 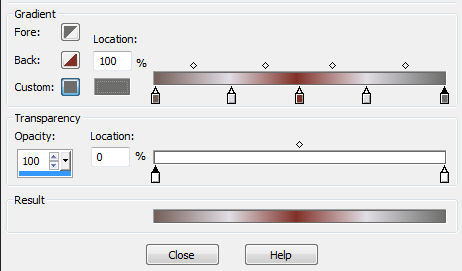

Effects / Plugins / I.C.NET Software / Unlimited 2 / Scribe / Donutz 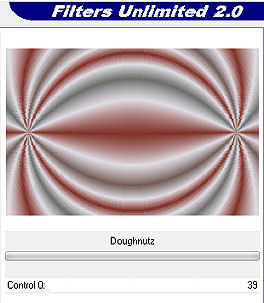
Effects / Geometric effect / Spherize / 100 / Ellipse Etapa 2 Selection / Load/save selection / Load selection From disk Aplique a seleção "purete1_animabelle" 
Edit / Cut Selection / Modify / Expand 7 Aperte a tecla Delete 5 vezes Selections / Select none Etapa 3 Layers / New raster layer Layers / Arrange / Move down Pinte com a cor 3 Copie e cole como nova layer o tube paisagem "lunapaisagem1679" Ative a ferramenta Pick ou Deform (K), mode Scale e estique um pouco a imagem nas laterais para preencher todo espaço. Layers / Merge visible layers Etapa 4 Layers / Duplicate Image / Resize em 90% (Resize all layers desmarcado) Selections / Load/save selection / Load selection From disk Aplique a seleção "purete2_animabelle" 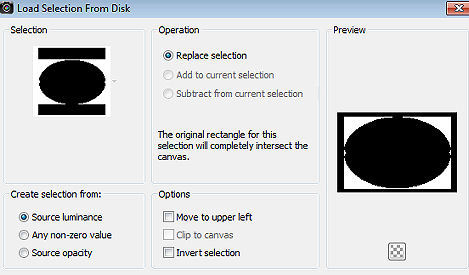
Edit / Cut Selections / Modify / Expand 7 Aperte a tecla Delete 5 vezes Pinte a seleção com o gradiente: Style Linear / Angle 130/ Repeat 0 / Invert desmarcado 
Clique 5 vezes com o baldinho de pintura, na seleção Effects / Plugins / Carolaine and sensibility / CS-LDots: 255 / 3 / 2 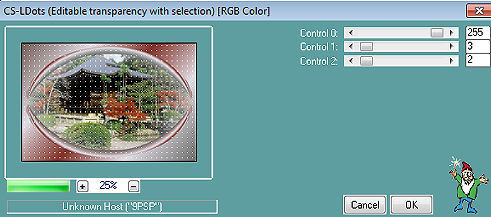
Selections / Select none Effects / Plugins / Alien Skin / Eye Candy 5 - Impact / Perspective Shadow Aplique o Settings "shadow4_animabelle" Clique no botão Manage e localize o preset na pasta do material do tutorial Ative a layer abaixo Effects / Texture effect / Fur 
Effects / Plugins / I.C.NET Software / Unlimited 2 / Simple / Pizza Slice Mirror Repita o efeito Pizza Slice Mirror effect uma segunda vez Effects / User Defined Filter / Emboss 3 Etapa 5 Image / Add borders / symmetric: 3 pixels na cor 2 40 pixels na cor 3 Selecione essa borda com a varinha mágica Volte ao gradiente Style radial inicial, mas altere Repeats para 3 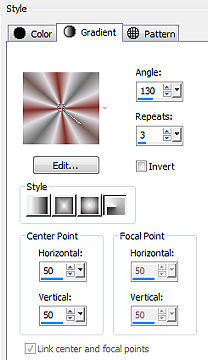
Adjust / Blur / Gaussian Blur em 60 Effects / Texture effect / Mosaic Antique 
Effects / 3D effect / Inner bevel 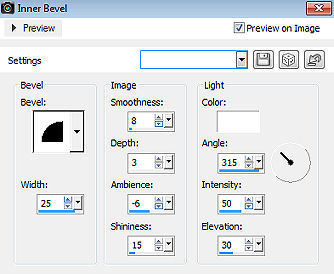
Selections / Select none Etapa 6 Copie e cole como nova layer o tube personagem (pl) Image / Resize em 90% (Resize all layers desmarcado) Posicione à esquerda, como no modelo final Effects / Plugins / Alien Skin / Eye Candy 5 - Impact / Perspective Shadow Clique no botão Manage e localize na pasta de materiais o preset "shadow1_animabelle" Clique nele e dê Ok Etapa 7 Copie e cole como nova layer o tube da flor "tubeclaudiaviza-flores146" Image / Resize em 80% (Resize all layers desmarcado) Posicione na base á direita, como no modelo final Adjust /Sharpness / Unsharp Mask 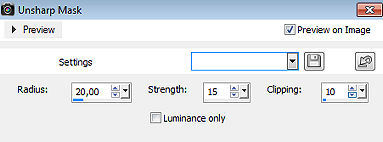
Repita novamente: Effects / Plugins / Alien Skin / Eye Candy 5 - impact / Perspective Shadow Mas altere as configurações na aba basic 
Etapa 8 Copie e cole como nova layer o tube corner (102ACOIN7) Image / Mirror Posicione na parte superior direita, como no modelo final Adjust / Sharpness / Sharpen Effects / 3D effect / Drop shadow: -3 / 3 / 40 / 6 / Preto Image / Add borders / 3 pixels na cor 2 Assine e Salve como JPEG Optimizer Dê um resize, se desejar. http://animabelle.free.fr/Tutoriels_Animabelle/page2/purete/purete.htm |  |
|


