Maily 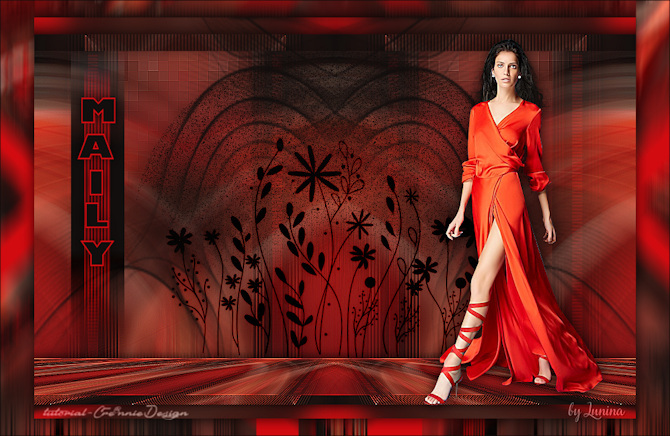
Obrigada Annie por autorizar a tradução  Material Aqui Fazer tubes é muito trabalhoso, portanto, deixe-os sempre intactos Importante preservar os direitos autorais do artista original Dê o crédito ao seu criador Agradecimentos as criadoras do tube e da mask: Gabry e Narah Plugins: EyeCandy 5: impact Mura's Meister
Simple (pode ser importado pelo Filters Unlimited 2) Abra os tubes e a mask no PSP, coloque as seleções na pasta "Selections" Dê 2 cliques no settings “maily-cre@nnie-mt” para importá-lo ao plugin correspondente Se usar um tube diferente, esse pode causar um resultado diferente nos efeitos 1. Abra uma imagem de 650 x 500 pixels - transparente 2. Coloque no foreground a cor clara 1 #d20c11 e no background a cor escura 2 #120e0d 3. Pinte a imagem com a cor do background 4. Selections / select all 5. Abra o tube Gabry-woman-47-2021 - Edit / copy 6. Edit / paste into selection na imagem 7. Selections / select none 8. Effects / image effects / seamless tiling / settings: default 9. Adjust / blur / radial blur 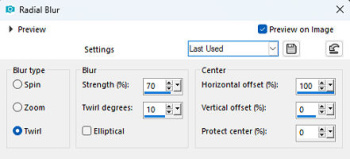
10. Layers / duplicate 11. Image / mirror (mirror - mirror horizontal) 12. Baixe a opacidade dessa layer para 50 13. Layers / merge / merge down 14. Effects / edge effects / enhance more 15. Selections / load/save selection / load selection from disk Aplique a seleção “maily-1-cre@nnie” 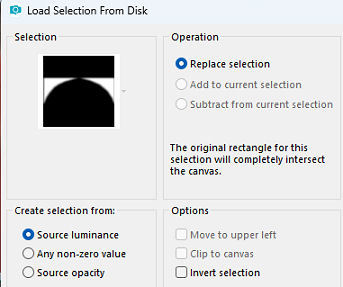
16. Selections / promote selection to layer 17. Selections / select none 18. Effects / distortion effects / pixelate: 15 / 15 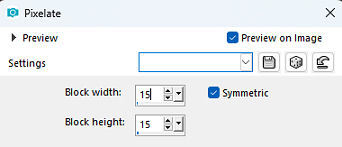
19. Effects / edge effects / enhance more 20. Effects / 3d effects / drop shadow: 0 / 0 / 80 / 30,00 - cor: preta 21. Selections / select all 22. Image / add borders / symmetric desmarcado Top e Botton 25 / Left e Right 75 - cor: background 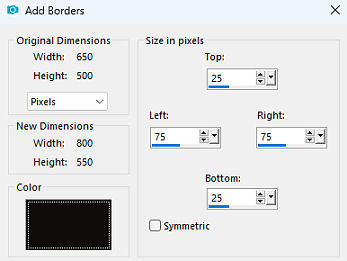
23. Effects / image effects / seamless tiling – como antes 24. Selections / invert 25. Effects / texture effects / blinds: 5 / 100 / cor: background / Light from left/top marcado 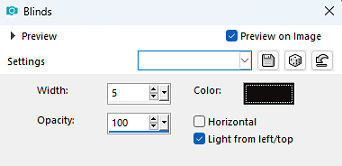
26. Selections / modify / contract / number of pixels: 20 27. Pinte a seleção com a cor do background 28. Effects / 3d effects / drop shadow – como antes 29. Selections / modify / contract / number of pixels: 10 30. Pinte a seleção com a cor do foreground 31. Effects / texture effects / blinds – marque agora o horizontal 32. Selections / select all 33. Image / add borders / symmetric desmarcado Top e Botton 25 / Left e Right 50 - cor: foreground 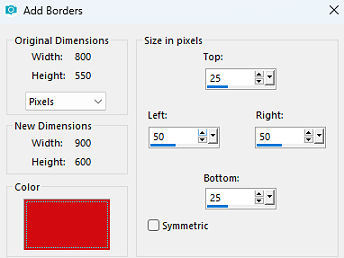
34. Effects / image effects / seamless tiling – como antes 35. Selections / invert 36. Adjust / blur / gaussian blur / radius: 20 37. Selections / invert 38. Effects / 3d effects / drop shadow – como antes 39. Selections / select none 40. Effects / image effects / seamless tiling 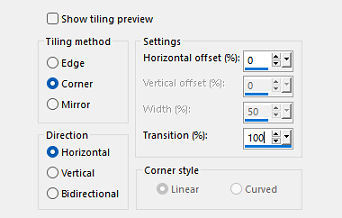
41. Layers / new raster layer 42. Ative a ferramenta Selection / custom selection e configure: Top 50 / Left 0 / Right 900 / Bottom 75 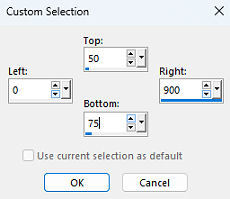
43. Pinte a seleção com a cor do background 44. Selections / select none 45. Effects / plugin / eyecandy 5: impact / motion trail – aplique o settings - maily-cre@nnie-mt 46. Mude o blend mode dessa layer para dissolve 47. Baixe a opacidade dessa layer para 25 48. Effects / geometric effects / circle / edge mode: transparent 49. Layers / merge / merge down 50. Selections / load/save selection / load selection from disk Aplique a seleção “maily-2-cre@nnie” 51. Selections / promote selection to layer 52. Selections / select none 53. Adjust / blur / motion blur: 0 / 100 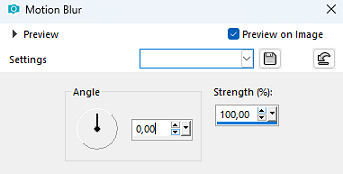
54. Effects / edge effects / enhance more Sua imagem estará semelhante a essa 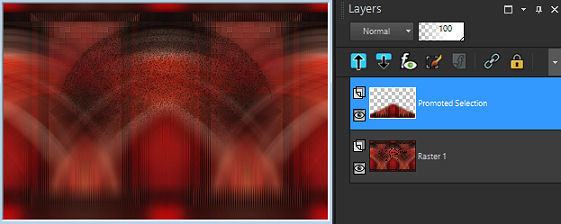
55. Abra a imagem flowers - Edit / copy 56. Edit / paste as new layer na imagem 57. Aperte a tecla K (select) / configure position x: 180.00 e position y: 173.00 58. Aperte a tecla M (deselect) 59. Mude o blend mode dessa layer para burn 60. Layers / new raster layer 61. Pinte a layer com a cor do background 62. Layers / new mask layer / from image Aplique a mask “NarahsMasks_1769” 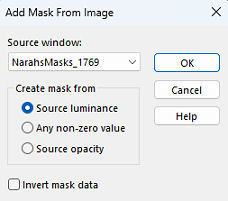
63. Layers / merge / merge group 64. Layers / duplicate 65. Image / mirror (mirror - mirror horizontal) 66. Layers / merge / merge down 67. Ative a layer de fundo 68. Layers / duplicate 69. Effects / plugin / mura's meister / perspective tiling (ou use o tube point 69 que está no material) 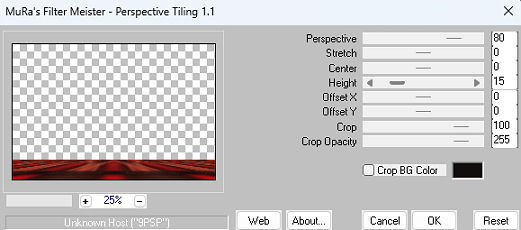
70. Layers / arrange / bring to front 71. Effects / edge effects / enhance 72. Effects / 3d effects / drop shadow – como antes 73. Abra o tube Gabry-woman-47-2021 - Edit / copy 74. Edit / paste as new layer na imagem 75. Image / resize em 60% - resize all layers desmarcado 76. Aperte a tecla K (select) / configure position x: 582.00 e position y: 31.00 77. Effects / 3d effects / drop shadow – como antes 78. Layers / new raster layer 79. Ative a ferramenta Selection / custom selection e configure: Top 50 / Left 55 / Right 135 / Bottom 350 
80. Pinte a seleção com a cor do background 81. Selections / modify / contract / number of pixels: 20 82. Pinte a seleção com a cor do foreground 83. Effects / texture effects / blinds – desmarque “horizontal” 84. Selections / select none 85. Image / rotate right 86. Effects / distortion effects / wind / from right / 100 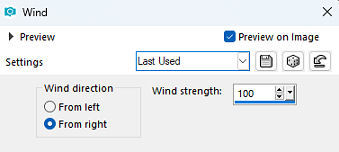
87. repita o wind 88. Image / rotate left 89. Abra o tube text-maily - Edit / copy 90. Edit / paste as new layer na imagem 91. Aperte a tecla K (select) / configure position x: 64.00 e position y: 120.00 92. Aperte a tecla M (deselect) 93. Effects / 3d effects / drop shadow – como antes 94. Selections / select all 95. Image / add borders – na última configuração usada 95. Selections / invert 96. Effects / plugins / simple / diamonds 97. Adjust / blur / motion blur – como antes 98. Selections / invert 99. Effects / 3d effects / drop shadow – como antes 100. Selections / select none 101. Layers / new raster layer / assine 102. Image / add borders / symmetric / 1 pixel na cor do background 103. Image / resize / width 800 pixels – resize all layers marcado 104. File / export / jpeg optimizer http://crea-annie-design.nl/maily.html | 
 AimooHelpForum
Aimoo Forum List |
Ticket |
Today |
Member |
Search |
Who's On |
Chat Room | Photos | Help |
Sign In |
AimooHelpForum
Aimoo Forum List |
Ticket |
Today |
Member |
Search |
Who's On |
Chat Room | Photos | Help |
Sign In |
 |
|


