Lucrèce 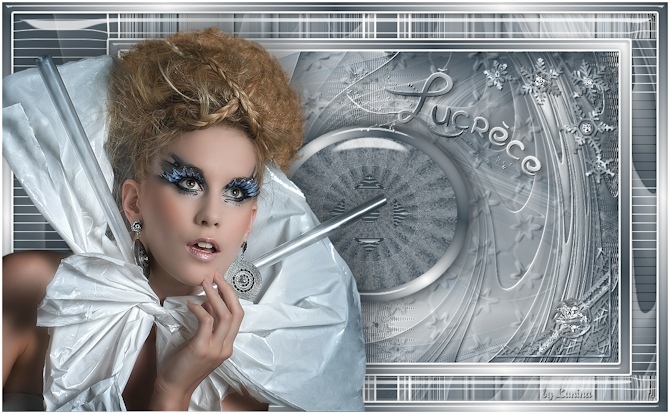
Obrigada Animabelle por autorizar atradução  Material Aqui O tube feminino é de livre escolha Este tutorial é uma criação pessoal de Animabelle Qualquer semelhança com outro é mera coincidência.
Plugins:
Kang 4
Redfield (Emblazer) dans le dossier du matériel
Filter Factory D
Eye Candy 5 - Impact
Carolaine and sensibility
L en K's LandKsiteofwonders
Mura's Seamles Cores 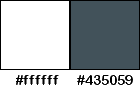
Cor 1 #ffffff / Cor 2 #435059 Sinta-se à vontade para alterar suas cores e o blend mode da layer para se adequar aos seus tubes e imagens, bem como a cor do drop shadow, se necessário. Inicialmente Abra todas as imagens no PSP incluindo a(s) mask(s). Duplique tudo e feche os originais pois trabalharemos com as cópias Realização Etapa 1 Abra uma imagem transparente de 800 x 500 pixels Foreground com a cor 1 e background com a cor 2 Forme o gradiente / Style Radial / Angle e Repeats 0 / Center Point 50 / 100 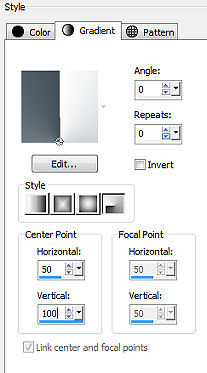
Pinte a imagem com o gradiente Effects / Plugins / Kang 4 / Bubblecross Waves: 255 / 18 / 255 / 255 / 255 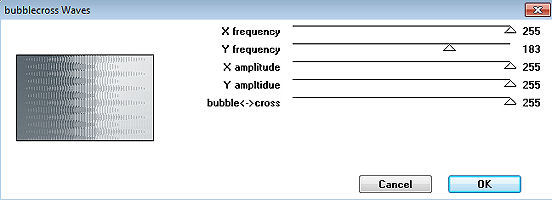
Effects / Image Effect / Seamless Tiling / side by side 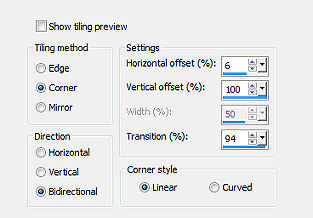
Adjust / Sharpness / Sharpen More Etapa 2 Layers / Duplicate Effects / Plugins / Redfield / Emblazer 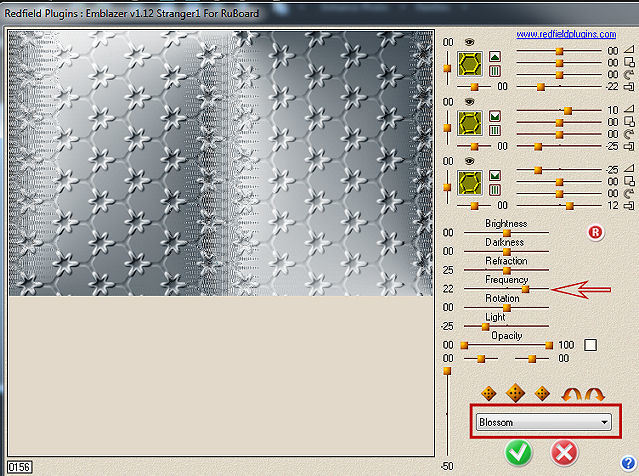
Baixe a opacidade da layer para 75 Adjust / Sharpness / Sharpen Etapa 3 Layers / New Raster Layer Pinte com o gradiente Style rectangular / Angle 0 / Repeats 2 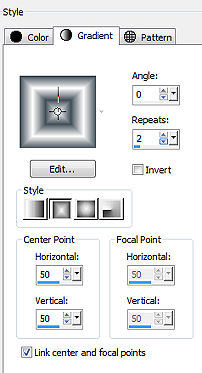
Layers / New Mask Layer / From Image Aplique a mask "045_masque_animabelle" 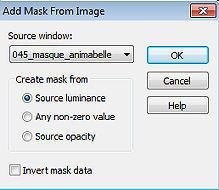
Layers / Merge / Merge Group Effects / Plugins / Mura's Seamless / Emboss at Alpha / Settings Default (não mexa em nada) Effects / 3D Effect / Drop Shadow: 2 / 2 / 90 / 5 / Cor 2 Etapa 4 Layers / Duplicate Deixe ativa a layer abaixo (group - raster 2) Effects / Distortion Effect / Wave 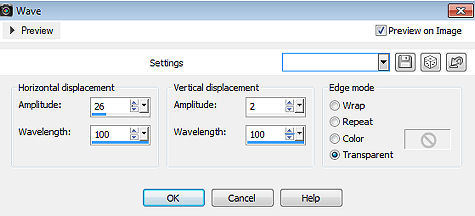
Mude o blend mode da layer para Hard light e baixe a opacidade para 70 Layers / Merge Visible Layers Etapa 5 Selections / Load/ save selection / Load selection From disk Aplique a seleção (sel1_lucrece_animabelle) 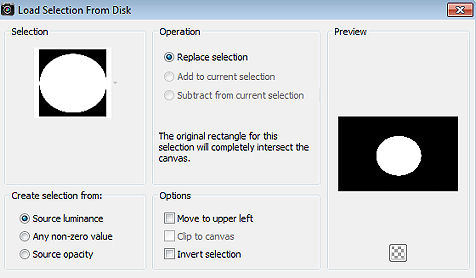
Selections / Promote selection to layer Layers / New Raster Layer Pinte a layer com a cor 2 Baixe a opacidade da layer para 45 Layers / Merge / Merge down Effects / Filter Factory D / Tunnel Tile: 98 / 12 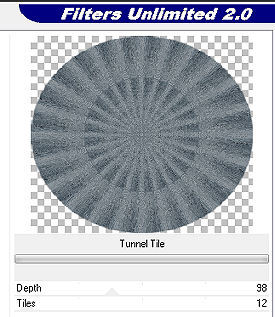
Adjust / Sharpness / Sharpen Effects / Alien skin / Eye Candy 5 / Impact / Glass 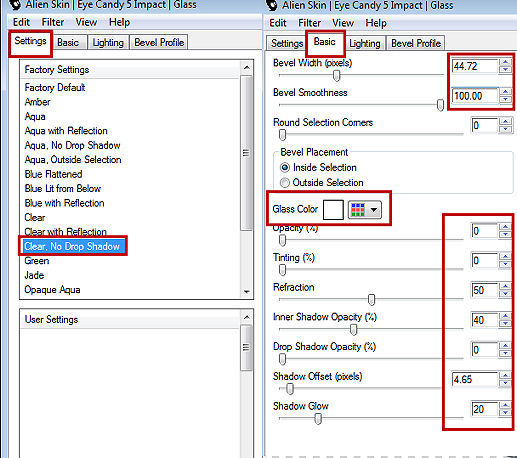
Selections / Modify / Select Selection Borders: Both Sides / 10 / Anti-alias 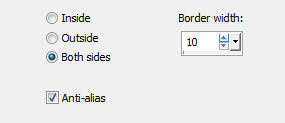
Pinte a seleção com o gradiente Style linear / Angle 50 / Repeats 3 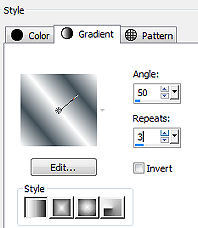
Effects / Eye Candy 5 / Impact / Glass (como antes) Selections / Select none Effects / 3D / Drop Shadow: 0 / 0 / 100 / 50 / cor #191e21 Etapa 6 Layers / New Raster Layer Selections / Load/ save selection / Load selection From disk Aplique a seleção "sel2_lucrece_animabelle" Pinte a seleção com a cor 2 Effects / Carolaine and sensitivity / CS Texture: 58 / 0 / 255 / 255 
Effects / Alien skin / Eye Candy 5 / Impact / Glass (como antes) Selections / select none Effects / 3D / Drop Shadow: 0 / 0 / 50 / 10 / #191e21 Layers / Merge All / Flatten Etapa 7 Copie e cole como nova layer o deco tube Não mova, está no lugar certo Mude o blend mode da layer para "Luminance Legacy" Effects / 3D Effect / Drop Shadow: 2 / 2 / 65 / 0 / #191e21 Etapa 8 Image / Add borders / symmetric: 3 pixels na cor 1 15 pixels na cor 2 3 pixels na cor 1 Selecione a borda de 15px com a varinha mágica Pinte a seleção com o gradiente Style linear / Angle 50 / Repeats 3
Effects / Alien skin / Eye Candy 5 - Impact / Glass (como antes) Slections / Select none Etapa 9 Image / Add borders / symmetric desmarcado: Top, Right e Bottom 40 / Left 150 / Cor 2 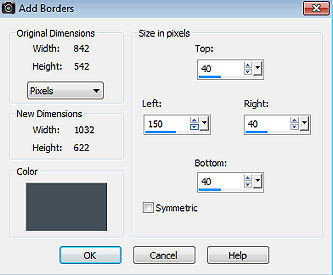
Selecione essa borda com a varinha mágica Effects / Plugins / L en K's LandKsiteofwonders / Mayra 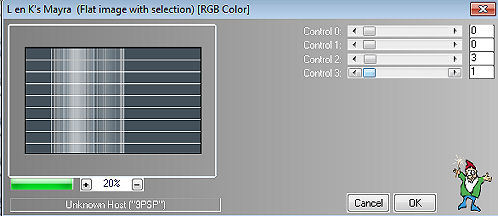
Selections / Promote selection to layer Effects / Reflection Effect / Rotating Mirror 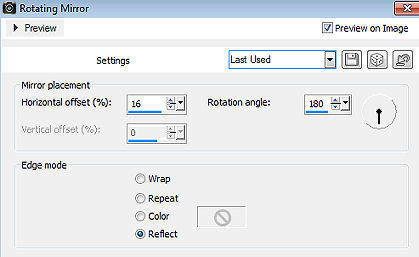
Etapa 10 Layers / New Raster Layer Pinte a layer com a cor 1 Layers / New Mask Layer / From Image Aplique a mesma mask aplicada anteriormente 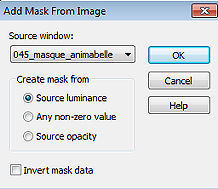
Layers / Merge Group Baixe a opacidade da layer para 50 Layers / Merge / Merge down Effects / Alien skin / Eye Candy 5 - Impact / Glass (como antes) Selections / select none Etapa 11 Image / Add borders / symmetric: 3 pixels na cor 1 15 pixels na cor 2 Selecione esss borda de 15px com a varinha mágica Pinte a seleção com o gradiente Style linear / Angle 50 / Repeats 5 e agora marque a opção "Invert" 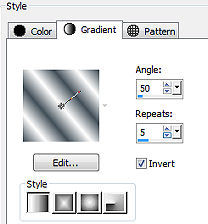
Effects / Alien skin / Eye Candy 5 - Impact / Glass (como antes) Selections / Select none Etapa 12 Copie e cole o tube feminino Dê Resize se necessário (resize all layers desmarcado) Effects / 3D Effect / Drop Shadow: -21 / 22 / 40 / 60 / Cor #191e21 Posicione à esquerda como no modelo final Etapa 13 Layers / New Raster Layer Selections / Load / save selection / Load selection From disk Aplique a seleção "sel3_lucrece_animabelle" Pinte a seleção com o gradiente Style linear / Angle 50 / Repeats 3 / Invert marcado 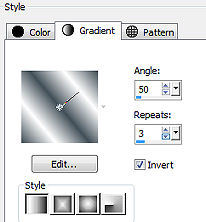
Selections / Select none Effects / Plugins / Mura's Seamles / Emboss at Alpha / default, como antes Effects / 3D Effect / Drop Shadow: 5 / 5 / 40 / 10 / cor #1f2529 Image / Add borders / 3 pixels na cor 1 Assine e Exporte copo JPEG ou PNG http://animabelle.free.fr/Tutoriels_Animabelle/page3/lucrece/lucrece.htm | 
 AimooHelpForum
Aimoo Forum List |
Ticket |
Today |
Member |
Search |
Who's On |
Chat Room | Photos | Help |
Sign In |
AimooHelpForum
Aimoo Forum List |
Ticket |
Today |
Member |
Search |
Who's On |
Chat Room | Photos | Help |
Sign In |
 |
|


