Les 272 
Obrigada Mieke por autorizar a tradução  Material Aqui Plugins: Mehdi / Sorting Tiles <I C Net Software> Filters Unlimited 2.0> / Simple AAA Frames / Texture Frame Coloque no Foreground a cor #867a89 e no Background a cor #ffffff 1. Abra uma imagem transparente com Width em 900 e Height em 550 2. Pinte a imagem com a cor #ffffff 2. Abra o deco-1-272.png Edit / Copy Edit / Paste as a new layer na imagem 3. Effects / Image Effects / Seamless Tiling / Settings: Side by Side 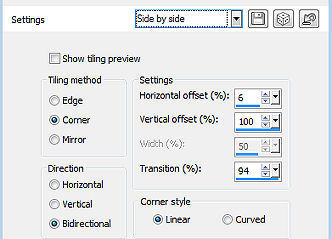
4. Layers / merge / merge down 5. Effects / Image Effects / Seamless Tiling / Settings: Default 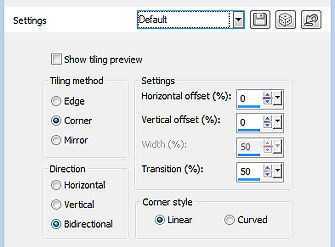
6. Effects / Plugins / Mehdi / Sorting Tiles: Block Range 150-300 / Block 260 / Plus marcado 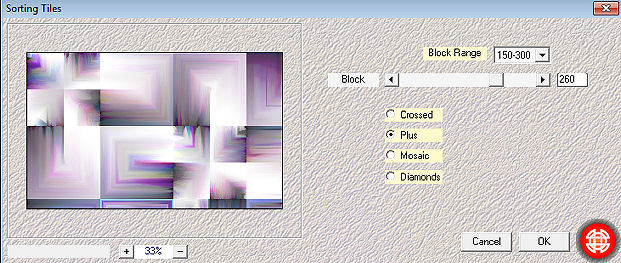
7. Effects / Plugins / <I C Net Software> Filters Unlimited 2.0> / Simple / Blintz 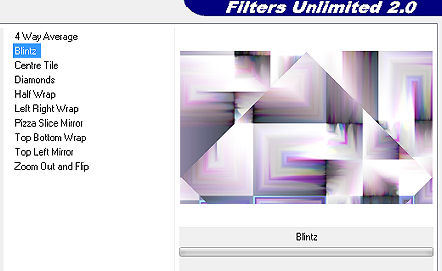
8. Repita o Plugin Filters Unlimited 2.0 / Simple / Blintz 9. Effects / Plugins / <I C Net Software> Filters Unlimited 2.0> / Simple / Top Left Mirror 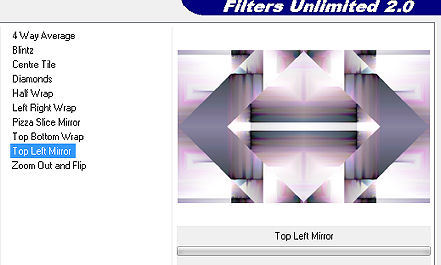
10. Selections / Load/Save Selection / Load Selection from Disk Aplique a seleção "les-mb-272-1.PspSelection" Selections / Promote selection to layer Selections / Select none 11. Effects / Plugins / <I C Net Software> Filters Unlimited 2.0> / Toadies / What Are You: 20 / 20 
12. Effects / 3D effects / Drop shadow: 0 / 0 / 40 / 80 - Cor branca 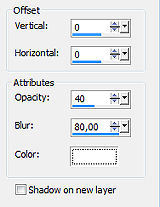
13. Effects / Edge Effects / Enhance 14. Abra o deco-1-272.png Edit / Copy Edit / Paste as a new layer na imagem 15. Abra o deco-2-272.png Edit / Copy Edit / Paste as a new layer na imagem Adjust / Sharpness / Sharpen 16. Image / Add Borders / 2 pixels na cor do Foreground 17. Selections / Select all 18. Edit / Copy 19. Image / Add borders / 50 pixels na cor branca 20. Selections / Invert Edit / Paste into selection 21. Adjust / Blur / Gaussian Blur / Radius: 30 22. Effects / Texture Effects / Mosaic Glass 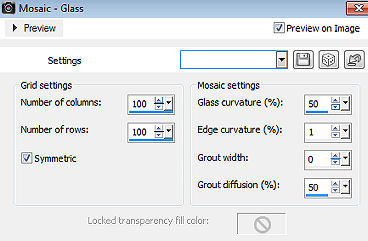
23. Selections / Invert 24. Effects / 3D Effects / Drop Shadow: 0 / 0 / 40 / 80 na cor preta 25. Selections / Select none 26. Effects / Plugins / AAA Frames / Texture Frame: Width em 8 (restante sem alteração) 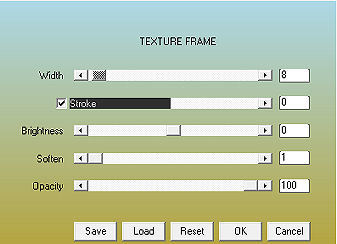
27. Abra o tube Kamalini-647.jpg Edit / Copy Edit / Paste as a new layer na imagem Mova o tube um pouco para a direita - veja modelo final (Ou Aperte a tecla K e configure position X 584.00 e position y 24.00) 
Aperte a tecla M Effects / 3D Effects / Drop Shadow: 0 / 0 / 40 / 80 na cor preta 27. Image / Add borders / 1 pixels na cor preta Assine Salve como JPEG. https://www.pspmieke.nl/lessen/les-272/les-272.html |  |
|


