| Eglantine 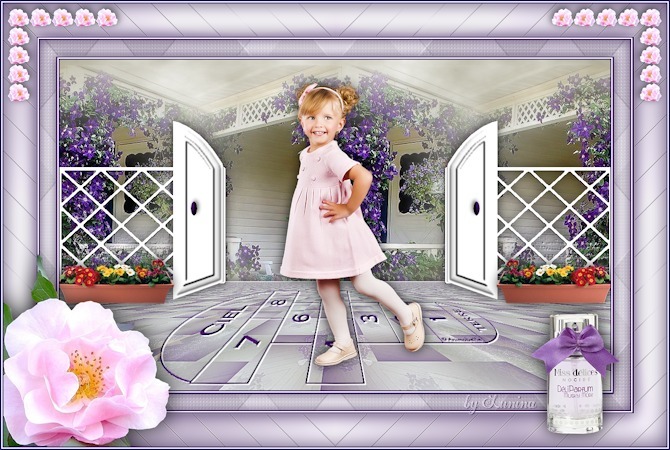
Obrigada Animabelle por autorizar a tradução  Material Aqui Este tutorial é uma criação pessoal de Animabelle Qualquer semelhança com outro é mera coincidência Plugins:
Mura's Seamless
Mura's Meister
Toadies
Carolaine and sensibility IMPORTANTE Abra todas as imagens do material no PSP incluindo a(s) mask(s). Duplique tudo e feche os originais pois não trabalharemos com eles. Coloque as seleções na pasta "Selections" do PSP Cores: 
1 #41096a / 2 #aa9cb3 / 3 #5a4a71 Sinta-se à vontade para alterar suas cores e o blend mode da layer para se adequar a seus tubes e imagens, bem como a cor das sombras (drop shadow), se necessário. Realização Etapa 1 Abra uma imagem transparente de 1000 x 600 pixel Ative a ferramenta Selection / Rectangle / Custom Selection: Top: 198 / Left: 0 / Right: 298 / Bottom: 403 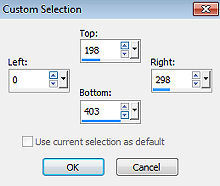 Pinte a seleção com a cor preta Effects / Mura's Seamless / Tile Frame Diagonal 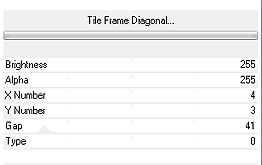 Selections / Modify / Select Selection Borders: Both sides / 4 / Anti-alias 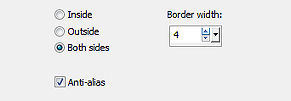
Pinte a borda com a cor branca Selections / select none Etapa 2 Com a varinha mágica / Tolerance e Feather em 0 / Outside: marcado Selecione a borda branca - todos os pequenas diagonais também serão selecionadas Selections / Invert Aperte a tecla Delete Selections / Modify / Expand em 1 Aperte a tecla Delete de 4 a 5 vezes. Selections / select none Effects / 3D Effect / Drop Shadow: 1 / 1 / 60 / 1 / Preto Etapa 3 Layers / New Raster Layer Selections / Load / save selection / From disk Aplique a seleção "eglantine1_animabelle" 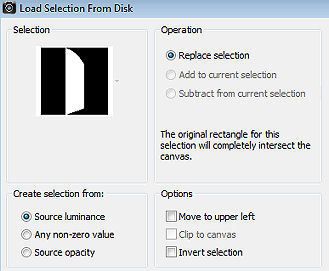
Pinte a seleção com a cor branca Effects / 3D effect / Inner Bevel 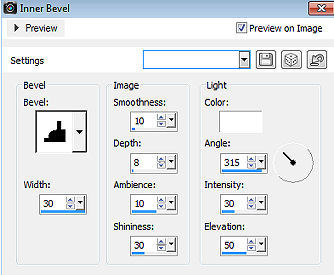
Selections / select none Etapa 4 Layers / New Raster Layer Selections / Load / save selection / From disk Aplique a seleção "eglantine3_animabelle" 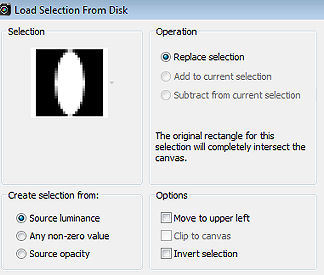
Pinte a seleção com a cor 1 Selections / select none Effects / 3D effect / Inner Bevel 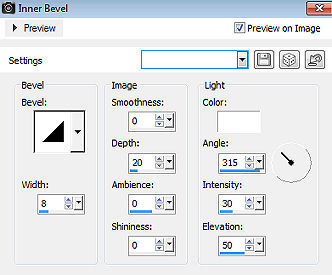
Effect / 3D Effect / Drop Shadow: -3 / 3 / 50 / 10 / Preto Layers / Merge Visible Layers Effects / 3D Effect / Drop Shadow: 0 / 0 / 70 / 25 / Preto Effects / Reflection Effect / Rotating Mirror 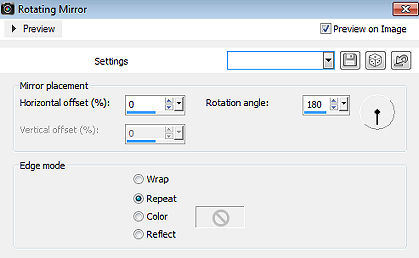
Etapa 5 Layers / New Raster Layer Layers / Arrange / Move Down Cor #969277 no foreground / Cor branca no background Effects / Mura's Meister / Cloud 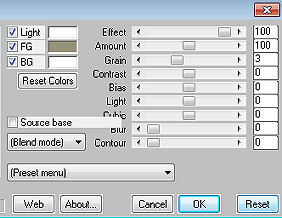
Copie e cole o tube paisagem (lunapaisagem6077) Adjust / Sharpness / Sharpen Effects / Image Effect / Offset: 0 / 50 / Custom e Transparent marcados Effects / Image Effect / Seamless Tiling 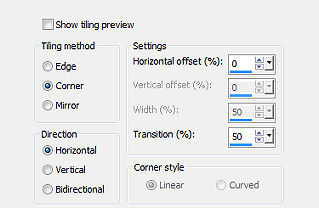 Layers / Merge / Merge down Etapa 6 Layers / Duplicate Effects / Graphic Plus / Kaleidoscope 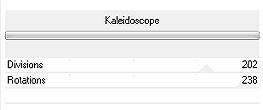 Effects / Image Effect / Seamless Tiling / Settings: Default Adjust / Softness / Soft Focus 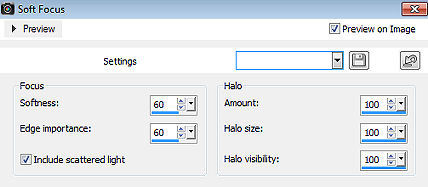 Effects / Texture Effect / Weave 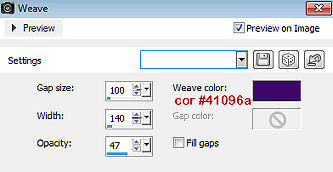 Effects / Mura's Meister / Perspective Tiling 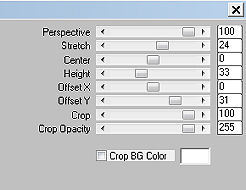 Adjust / Sharpness / Sharpen More Effect / 3D Effect / Drop Shadow: -3 / 0 / 50 / 20 / Preto Etapa 7 Layers / New Raster Layer Pinte a layer com a cor 1 Layers / New Mask Layer / From Image Aplique a mask "masque_marelle_Animabelle", com "Invert mask data" marcado 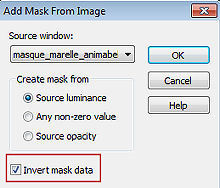
Layers / Merge Group Effects / Mura's Meister / Perspective Tiling 
Etapa 8 Selections / Load / save selection / From disk Aplique a seleção "eglantine2_animabelle" 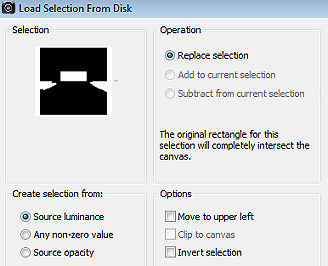
Aperte a tecla Delete Selections / select none Effects / 3D Effect / Drop Shadow: 2 / 2 / 100 / 0 / Branca Effects / User Defined Filter / Emboss 3 Etapa 9 Ative a layer do topo Copie e cole como nova layer o tube "jardinieres_animabelle" Effects / Image Effect / Offset: 0 / -100 / Custom e Transparent marcados Effects / 3D Effect / Drop Shadow: 0 / 0 / 80 / 30 / Preto Etapa 10 Copie e cole o tube da menininha Image / Resize em 55% (resize all layers: desmarcado) Adjust / Sharpness / Sharpen Posicione o tube como no modelo final Effect / 3D Effect / Drop Shadow: 0 / 0 / 80 / 30 / Preto Etapa 11 Image / Add Borders: 2 pixel na cor 1 2 Pixel na cor branca 2 pixel na cor 1 30 pixels na cor branca Cor 2 no foreground / Branca no background (Altere as cores de acordo com seus tubes) Selecione a borda com a varinha mágica / Tolerance e Feather em 0 / Inside: marcado Forme o gradiente Style Linear: 130 / 3 Pinte a seleção com esse gradiente Effects / Toadies / Darwin 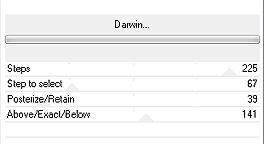
Effects / Carolaine and Sensitivity / CS-LDots 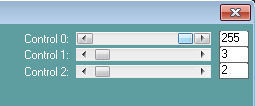
Effects / User Defined Filter / Emboss 3 Effects / 3D Effect / Cutout 
Layers / Duplicate Image / Mirror Selections / select none Baixe a opacidade da layer para 50 Etapa 12 Image / Add Borders: 2 pixel na cor 1 2 Pixel na cor branca 2 pixel na cor 1 60 pixel na cor branca Na paleta do gradiente marque a opção "Invert" Selecione a borda com a varinha mágica Foreground Cor Branca / Background Cor 2 Gradiente: Style Linear / 130 / 3 
Pinte a borda com o gradiente Adjust / Blur / Gaussian Blur em 10 Effects / Carolaine and Sensitivity / CS-DLines 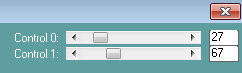
Effects / Reflection Effect / Rotating Mirror (como antes) Effects / Edge Effect / Enhance Effects / 3D Effect / Cutout 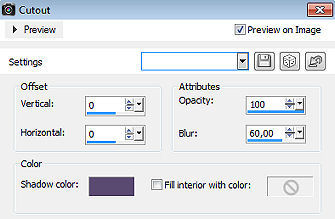
Selections / select none Etapa 13 Copie e cole o tube "eglantine_animabelle" Image / Mirror Image / Resize em 65% (resize all layers: desmarcado) Adjust / Sharpness / Sharpen Posicione na base à esquerda, como no modelo final Effects / 3D Effect / Drop Shadow: 0 / 0 / 80 / 60 / Preto Etapa 14 Copie e cole o tube do perfume e posicione na base à direita (veja modelo final) Effects / 3D Effect / Drop Shadow: 0 / 0 / 80 / 40 / Preto Etapa 15 Copie e cole o tube corner Mova para a parte superior esquerda (veja modelo final) Effects / Reflection Effect / Rotating Mirror (como antes) Image / Add Borders: 2 pixel na cor 2 2 Pixel na cor branca 2 pixel na cor 2 Assine e Salve como JPEG Optimizer após dar resize se você desejar. http://animabelle.free.fr/Tutoriels_Animabelle/page3/eglantine/eglantine.htm | 
 AimooHelpForum
Aimoo Forum List |
Ticket |
Today |
Member |
Search |
Who's On |
Chat Room | Photos | Help |
Sign In |
AimooHelpForum
Aimoo Forum List |
Ticket |
Today |
Member |
Search |
Who's On |
Chat Room | Photos | Help |
Sign In |
 |
|


