| Douceur Matinale 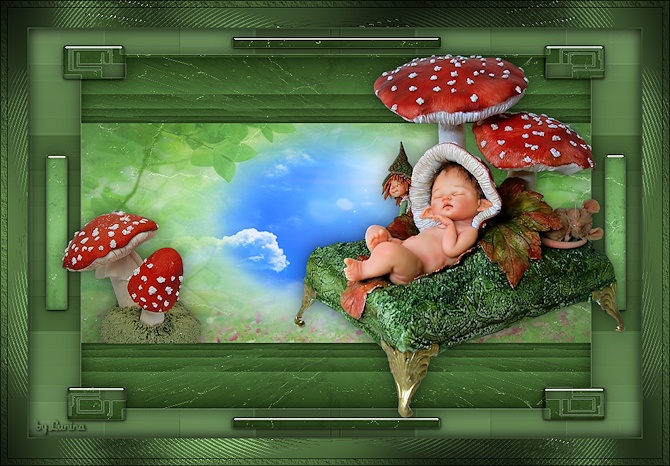
Obrigada Animabelle por autorizar a tradução  Este tutorial é uma criação pessoal de Animabelle Qualquer semelhança com outro é mera coincidência Material Aqui Plugins: MuRa's Meister
< I.C.NET Software > / Filters Unlimited 2.0 / Filter Factory Gallery H < I.C.NET Software > / Filters Unlimited 2.0 / Tile & Mirror
< I.C.NET Software > / Filters Unlimited 2.0 / Photo Aging Kit
Alien Skin Eye Candy 5: impact
AAA Filters
< I.C.NET Software > / Filters Unlimited 2.0 / Neology
Graphics Plus
AAA Frame 1. Abra todo material necessário no Psp Duplique-o e feche os originais. Salve com frequência seu trabalho 2.
Escolha 2 belas cores de seus tubes, imagens, misteds... Para este tutorial foram escolhidas as seguintes cores: 
Cor 1 #8db783 / Cor 2 #39502c Fique à vontade paea alterar o blend mode e a opacidade da layer, se necessário 3. Abra uma imagem transparente de 900 x 600 pixels Coloque no foreground a cor 1 e no background a cor 2 Effects / Plugins / Mura's Meister / Cloud / Default 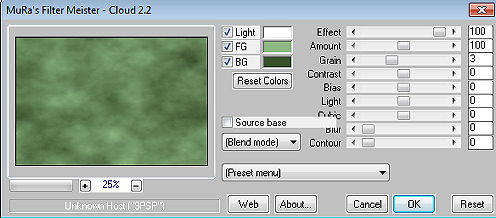
Effects / Plugins / <I.C.NET Software> / Filters Unlimited 2.0 / Filter Factory Gallery H / "Alias Blur": 94 / 33 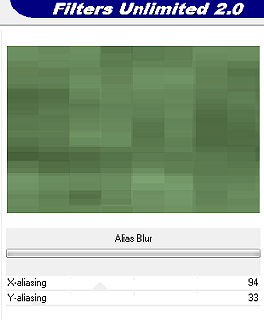
Effects / User Defined Filters / Emboss_3 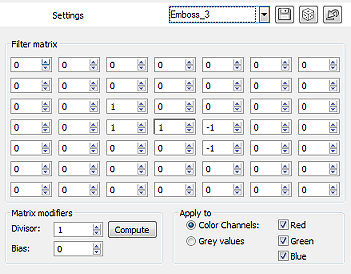
Effects / Plugins / <I.C.NET Software> / Filters Unlimited 2.0 / Tile & Mirror / "Quadrant Mirror" 4. Layers / New raster layer Pinte a layer com o gradiente; Style Linear / Angle 0 / Repeat 1 / Invert marcado 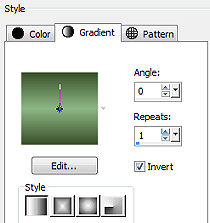
Adjust / Blur / Gaussian Blur / Radius em 20 Layers / New Mask Layer / From Image Aplique a mask "masque_decoart", com "Invert mask data" marcado 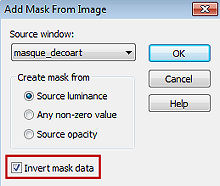
Layers / Merge / Merge group 5. Layers / Duplicate Effects / Plugins / <I.C.NET Software> / Filters Unlimited 2.0 / Photo Aging Kit / "Dirt & Dust": 176 / 113 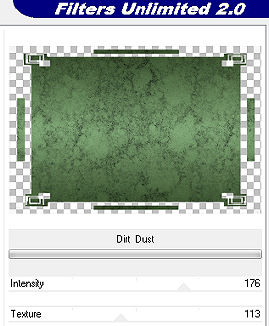 Effects / Plugins <I.C.NET Software> / Filters Unlimited 2.0 / Photo Aging Kit / "Craked Paper": 255 / 128 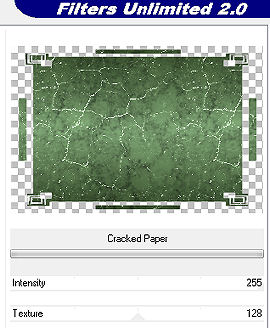
Mude o blend mode da layer para "Hard light" - Baixe a opacidade para 40 Adjust / Sharpness / Sharpen 6. Ative a layer abaixo "Group - Raster 2" Effects / Plugins / Alien Skin Eye Candy 5: impact / Perspective Shadow na aba "Basic" configure como abaixo / cor preta 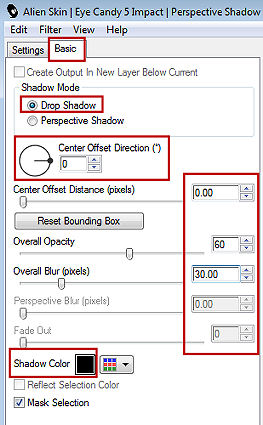
Layers / Merge visible layers 7. Selections / Load/save selection / Load selection from disk Aplique a seleção "Sel1_Douceur_Matinale_Animabelle" 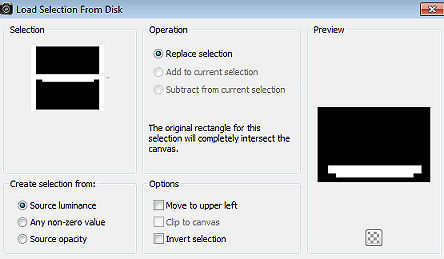
Selections / Promote selection to layer Effects / Plugins / MuRa's Meister / Perspective Tiling / settings Default 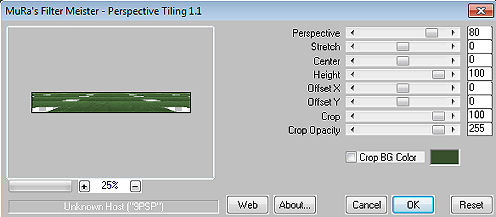
8. Selections / Invert Effects / Plugins / Alien Skin Eye Candy 5: impact / Perspective Shadow - como antes Selections / Select none Layers / Duplicate Image / Flip Layers / Merge / Merge down 9. Selections / Load/save selection / Load selection from disk Aplique a seleção "Sel2_Douceur_Matinale_Animabelle" 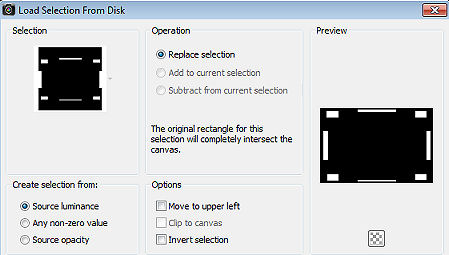
Selections / Promote selection to layer Effects / Plugins / Alien Skin Eye Candy 5: impact / Glass Em Setting, aplique o "Clear" 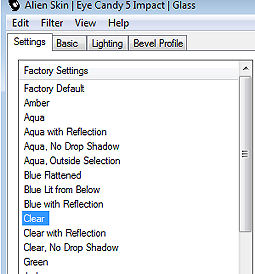
Selections / Select none 10. Ative a layer de fundo - "Merged" Selections / Load/save selection / Load selection from disk Aplique a seleção "Sel3_Douceur_Matinale_Animabelle" Layers / New raster layer Copie e cole na seleção a imagem "Image_Fond_Nature" Layers / New Mask Layer / From Image Aplique a mask "20-20" 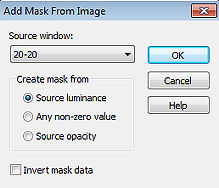
Selections / Select none Layers / Merge visible layers 11. Layers / Duplicate Effects / Plugins / AAA Filters / Custom / Landscape Click apenas em "Landscape" e depois em "OK" 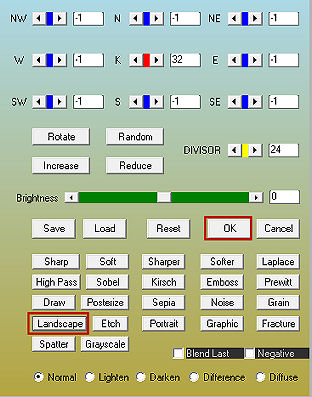
Baixe a opacidade da layer para 50 Layers / Merge All (Flatten) 12. Selections / Select all Effects / 3D effect / Cutout: 0 / 0 - 100 / 30,00 - cor preta 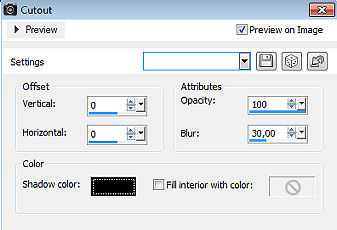
Selections / Select none Image / Add borders / symmetric / 2 pixels na cor 2 Selections / Select all Image / Add borders / symmetric / 40 pixels na cor 2 Selections / Invert Effects / Plugins / <I.C.NET Software> / Filters Unlimited 2.0 / Neology "Polar Waves" / Settings em Default 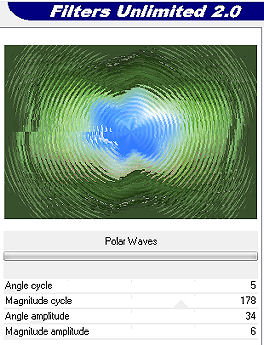
14. Effects / Plugins / Graphics Plus / Cross Shadow / Settings em Default 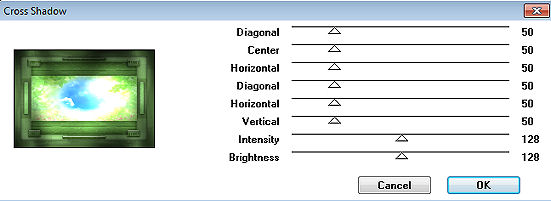
Effects / Plugins / AAA Frame / Texture Frame 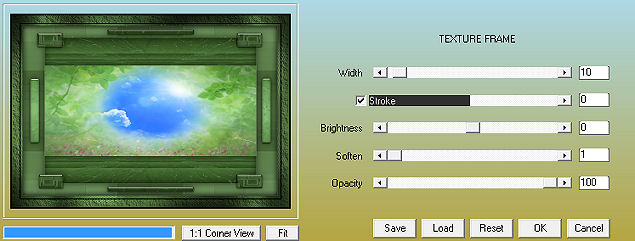
Selections / Select none 15. Copie e cole como nova layer o tube "158_tubes_enfantin_animabelle" Image / Resize em 55%, resize all layers desmarcado Apague a marca dágua Posicione o tube à direita (veja modelo final) Effects / Plugins / Alien Skin Eye Candy 5: impact / Perspective Shadow - como antes 16. Copie e cole como nova layer o tube "159_tubes_enfantin_animabelle" Image / Resize em 30%, resize all layers desmarcado Remova a marca dágua Effects / Plugins / Alien Skin Eye Candy 5: impact / Perspective Shadow - como antes 17. Forme um retangulo na base do tube com a ferramenta selection rectangle (Tolerance e feather em 0) 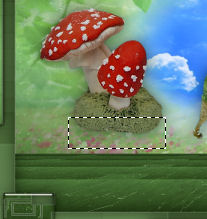
Edit / Cut ou aperte a tecla Delete Selections / Select none Posicione o tube à esquerda na base na frame (veja modelo final) 18. Layers / New raster layer Assine Layers / Merge All (Flatten) http://animabelle.free.fr/Tutoriels_Animabelle/page1/douceur_matinale/douceur_matinale.htm |  |
|


