Barbara 
Obrigada Animabelle por autorizar a tradução  Este tutorial é uma criação pessoal de Animabelle Qualquer semelhança com outro é mera coincidência. Material Aqui Plugins: Filter Factory Gallery A / Kaléidoscope II
Flaming Pear / Flexify 2
Eye Candy 5 - Nature / Drip
Mura's Meister / Cloud IMPORTANTE Abra todas as imagens no PSP incluindo as masks. Duplique tudo e feche os originais pois trabalharemos com as cópias. Realização Cores: 
#4e4232 / #c3b39a Etapa 1 Abra o tube feminino no psp (Nicky - Female 639) Depois de duplicar e fechar a original, remova o background e a layer da marca dágua Na layer da moça, também remova a assinatura com a ferramenta selection rectangle 
Edit / Cut Selections / Select none Etapa 2 Abra uma imagem transparente de 900 x 600 pixels Pinte a imagem com o gradiente: Style Radial / Angle 0 / Repeats 9 / Invert desmarcado  Selection / Select all Copie e cole na seleção o tube feminino Selections / Select none Adjust / Blur / Radial blur: Zoom / 100 / Eliptical marcado / 0 / 0 / 50 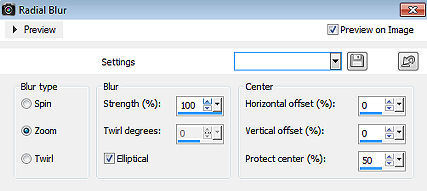
Effects / Plugins / Filter Factory Gallery A / Kaleidoscope II 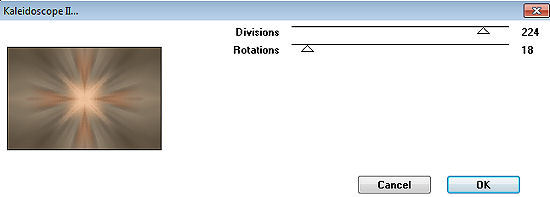
Image / Resize em 130%, resize all layers desmarcado Effect / User Defined filter / Emboss 3 Etapa 3 Copie e cole o tube "ratounet_animabelle" Image / Resize em 80%, resize all layers desmarcado Effects / Image effect / Offset: -170 / -130 / Custom e Transparent marcados 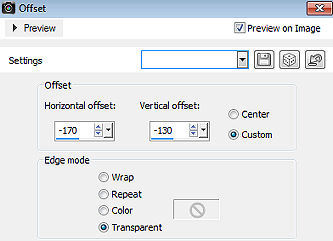
Adjust / Sharpness / Unsharp Mask 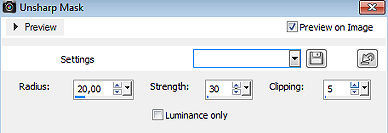
Etapa 4 Layer / New raster layer Ative a ferramenta Selection / Custom selection: Top 200 / Left 74 / Right 830 / Bottom 400 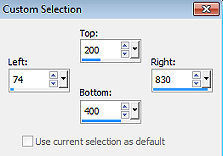
Effects / Plugins / Mura's Meister / Cloud / Settings: Default Selections / Select none Effects / Plugins / Flaming Pear / Flexify 2 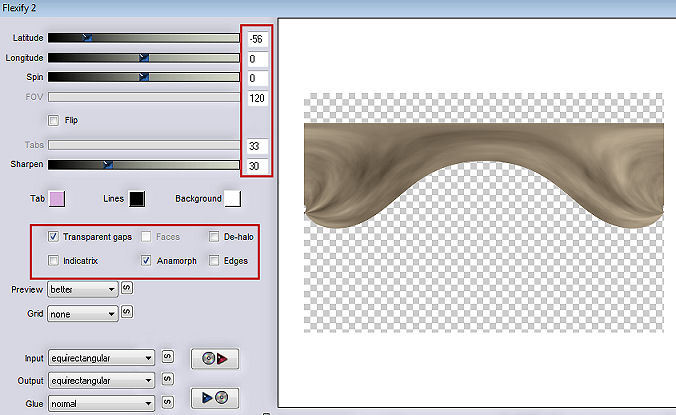
Effects / Image effect / Offset: 0 / 75 / Custom e Transparent marcados 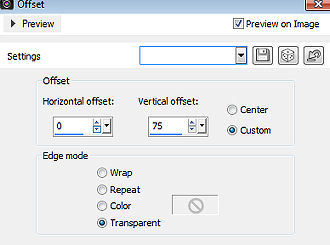
Effects / User Defined filter / Emboss 3 Effect / Plugins / Alien Skin / Eye Candy 5 - Nature / Drip 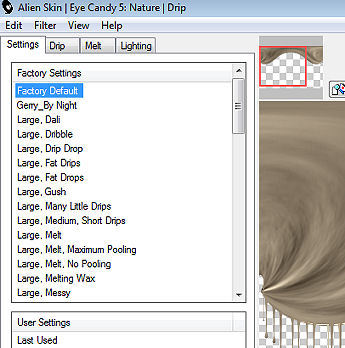
Effect / 3D effect / Drop shadow: 15 / 0 / 30 / 30 / Preto Etapa 5 Image / Add borders / 2 pixels na cor escura Image / Add borders / 8 pixels na cor clara Selecione essa borda com a varinha mágica Pinte a seleção com o gradiente Style Linear / Angle 130 / Repeats 5 / Invert marcado 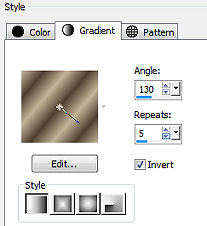
Selections / Select none Etapa 6 Image / Add borders / 2 pixels na cor escura Image / Add borders / 35 pixels na cor clara Selecione essa borda com a varinha mágica Effects / Plugins / Mura's Meister / Cloud / Settings: Default Effects / 3D effect / Inner bevel 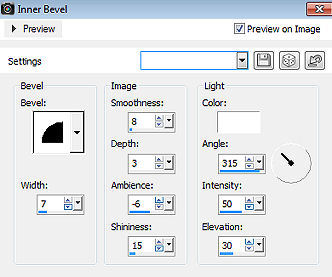
Selections / Select none Etapa 7 Image / Add borders / 2 pixels na cor escura Image / Add borders / 8 pixels na cor clara Selecione essa borda com a varinha mágica Pinte com o mesmo gradiente linears anterior e desmarque a opção Invert 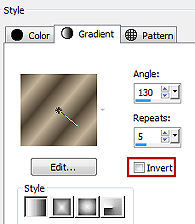
Selections / Select none Etapa 8 Copie e cole como nova layer o tube feminino (Nicky - Female 639) Effects / Image effect / Offset: 240 / 0 / Custom e Transparent marcados 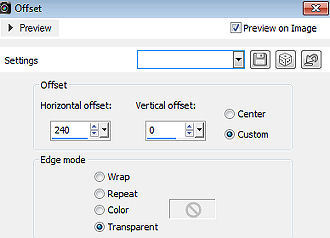
Effect / 3D effect / Drop shadow: 15 / 15 / 30 /30 / Preto Repita com -15 / -15 Etapa 9 Copie e cole como nova layer o tube corner Image / Resize em 90%, resize all layers desmarcado Posicione no canto inferior esquerdo (veja modelo final) Layers / Duplicate Image / Flip Layer / Merge / Merge down Adjust / Sharpness / Sharpen Effect / 3D effect / Drop shadow: 5 / 5 / 30 / 10 / Preto Layers / Duplicate Image / Mirror Layers / Merge All / Flatten Etapa 10 Ative a ferramenta Text (T) Com uma fonte de sua escolha Cor escura no fore e no background #4e4232 Escreva: Barbara Effect / 3D effect / Drop shadow: 3 / 3 / 100 / 1 / Cor #c3b39b Assine e export como JPEG Optimizer Dê um resize a 900 pixels widht, se desejar. http://animabelle.free.fr/Tutoriels_Animabelle/page2/barbara/barbara.htm |  |
|


