You Are Naturally 
Obrigada Manuela por autorizar a tradução  Agradecimentos aos criadores dos tubes e materiais Tubes woman Cady - Text Selections SelectionMDesign You Are Naturally Deco's deco linette - Maantje @ Deco's Maantje @ WA You Are Naturally Plugins: Filters Unlimited 2.0 VM 1 / Web Weaver Filter Factory Gallery J / Drink To Me Flaming Pear / Flexify 2 Corolaine and Sensibility / CS HLines / CS Reflection / CS LDots AAA Frames / Photo Frame Material Aqui Coloque as seleções na pasta "Selections" Usando outras cores é possivel ter que alterar o blend mode e a opacidade da layer porque o efeito final pode resultar diferente Escolha 4 cores de seus tubes Aqui foram escolhidas as seguintes cores: 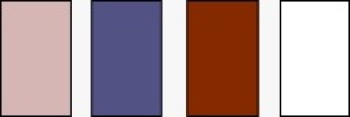
Cor 1 #d1b1b5 / Cor 2 #575583 / Cor #822b07 / Cor #ffffff Coloque no Foreground a cor 1 e no Background a cor 3 Forme no Foreground o gradiente: Style Linear / Angle 0 / Repeats 0 / Invert desmarcado 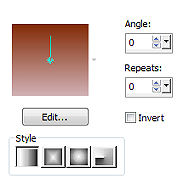
Abra uma imagem de 800 x 500 transparente Pinte a imagem com o gradiente Layers / New raster layer Coloque no Foreground a cor 2 e no Background a cor 3 Forme o gradiente Style Linear / Angle 0 / Repeats 0 / Invert desmarcado 
Pinte a layer com o gradiente Effects / Plugins / Unlimited 2.0 / VM 1 / Web Weaver: Size em 255 / Transparency em 150 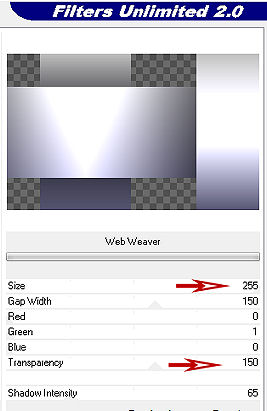
Effects / Plugins / Unlimited 2.0 / Filter Factory Gallery J / Drink To Me: 15 Layers /Duplicate Effects / Plugins / Unlimited 2.0 / Filter Factory Gallery J / Drink To Me: 60 Effects / Plugins / Flaming Pear / Flexify 2: Setting: -27 / -24 / 50 / 101 / Sharpen 75 / Tab Cor 4 / Background Cor 2 Transparent gaps / Better / None / Equirectangular / Stereographic / Normal 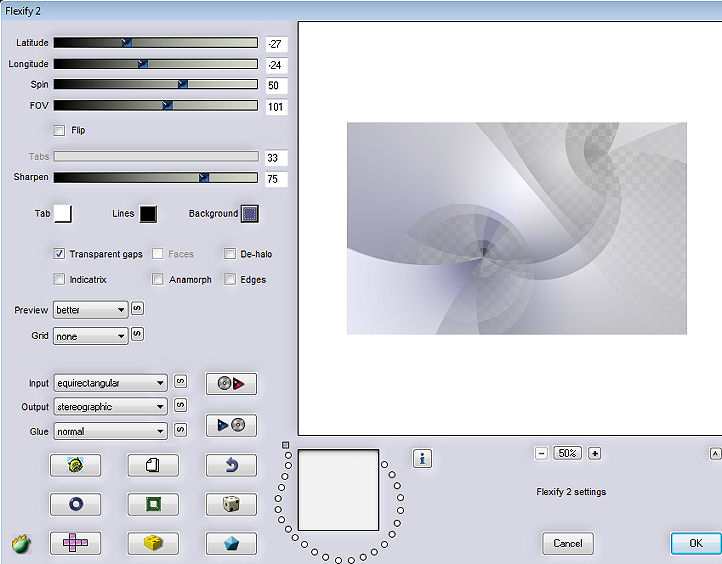
Mude o blend mode da layer para Hard Light Ative a layer abaixo (Raster 2) Mude o blend mode para Hard Light Selections / Load/save selection Load selection from disk Aplique a seleção "SelectionMDesign You Are Naturally" 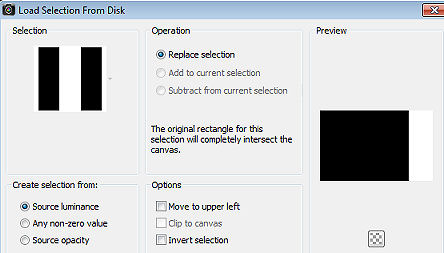
Ative a layer de fundo (Raster 1) Selections / Promote Selection to Layer Layers / Arrange / Move Up Effects / Plugins / Corolaine and Sensibility / CS HLines: 2 / 0 / 10 Effects / 3D Effects / Drop Shadow: 10 / 10 / 50 / 10 - Preto Repita com -10 / -10 / 50 / 10 Selections / Select none Mude o blend mode para Burn e baixe a opacidade para 45 Abra o tube Text Edit / Copy - Edit / Paste as a new layer na imagem Effects / Image Effects / Offset: Horizontal 100 / Vertical 0 / Custom e Transparent marcados Effects / 3D Effects / Drop Shadow: 0 / 0 / 50 / 10 - Preto Repita o drop shadow Selections / Load/save selection Load selection from disk Aplique a seleção "SelectionMDesign You Are Naturally A" 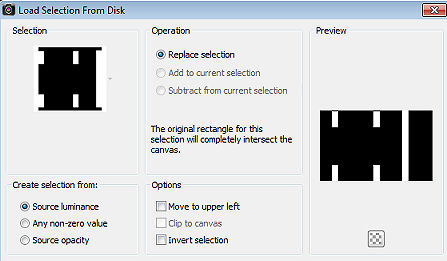
Ative a layer de fundo (Raster 1) Selections / Promote Selection to Layer Layers / Arrange / Bring to top Selections / Select none Effects / Plugins / Corolaine and Sensibility / CS Reflection / Default Effects / Plugins / Corolaine and Sensibility / CS LDots: 45 / 4 / 2 Mude o blend mode para Overlay Layers / Arrange / Move Down Effects / 3D Effects / Drop Shadow: 0 / 0 / 50 / 10 - Preto Repita o drop shadow Selections / Load/save selection / Load selection from disk Aplique a seleção "SelectionMDesign You Are Naturally B" 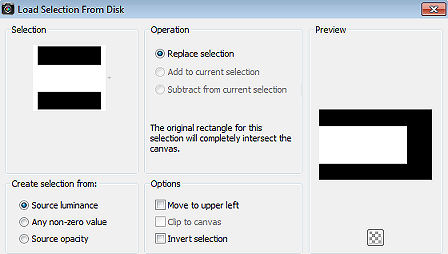
Ative a layer de fundo (Raster 1) Selections / Promote Selection to Layer Effects / Plugins / AAA Frames / Photo Frame: 10 / 0 / 0 / 10 / 0 / 0 / 0 / 100 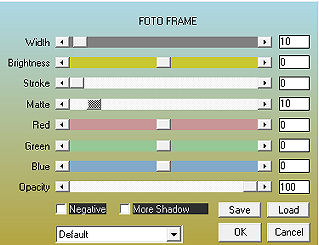
Layers / Arrange / Bring to Top Selections / Select none Mude o blend mode para Hard Light Abra o Deco linette Edit / Copy - Edit / Paste as new layer na imagem Mude o blend mode para Dodge Effects / 3D Effects / Drop Shadow: 10 / 10 / 50 / 10 - Preto Repita com -10 / -10 / 50 / 10 Selections / Load/save selection / Load selection from disk Aplique a seleção "SelectionMDesign You Are Naturally C" 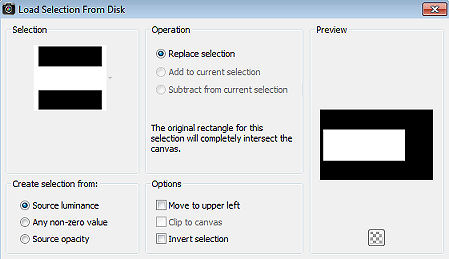
Abra o tube feminino Cady / ou o de sua escolha (Apague a marca dágua) Edit / Copy - Edit / Paste as a new layer Mova parte do tube para dentro da seleção Selections / Invert Aperte a tecla Delete Selections / Select none Effects / 3D Effects / Drop Shadow: 0 / 0 / 50 / 10 - Preto Abra o tube Maantje @ Deco1 Edit / Copy - Edit / Paste as a new layer Effects / Image Effects / Offset Horizontal 222 / Vertical 0 / Custom e Transparent marcados Effects / 3D Effects / Drop Shadow: 5 / 5 / 50 / 10 - Preto Abra o tube Maantje @ Deco2 Edit / Copy - Edit / Paste as a new layer Effects / Image Effects / Offset: Horizontal -284 / Vertical 0 / Custom e Transparent marcados Effects / 3D Effects / Drop Shadow: 5 / 5 / 50 / 10 - Preto Abra o tube Maantje @ WA You Are Naturally Edit / Copy - Edit / Paste as a new layer Effects / Image Effects / Offset Horizontal 350 / Vertical 0 / Custom e Transparent marcados Image / Add borders / symmetric: 5 pixels branca 2 pixels na cor 2 30 pixels na cor branca 2 pixels na cor 2 Layers / New raster layer Assine Layers / Merge / Merge all layers https://maantje-psp-design.jouwweb.nl/les-86-you-are-naturally |  |
|


