| Beautiful Autumn 
Obrigada Manuela por autorizar a tradução  Material Aqui Agredecimentos aos criadores dos tubes e materiais Tubes Masks mask edith 94 Monaiekje mask 35 1 Ildiko_Desings_Created@Mask_r9 (6) Selections SelectionMDesign Beautiful Autumn Expiration ESAutumn07 Wordart MDesign Beautiful Autumn Plugins Tramages / Tow The Line MuRa Seamless / Sharpen Graphic Plus / Cross Shadow ScreenWorks / Pin Hole AAA Frames / Photo Frame / Photo Frame Coloque o Gradiente e as Seleções nas respectivas pastas do Psp Está usando outras cores e tubes? Então é possível alterar o blend mode e a opacidade da layer para que os efeitos não resultem diferentes daqueles que aparecem no tutorial Escolha 4 cores de seus tubes Neste tutorial foram escolhidas as cores:  Cor 1 #fbb85a / Cor 2 #952a16 / Cor 3 #d88036 / Cor 4 #633b21 Coloque no Foreground o Gradiente ESAutumn07 e no Background a cor 4 Configure o Gradiente em Style Linear / Angle 0 / Repeats 0 Abra uma imagem de 800 x 500 pixels Transparente Pinte a imagem com o gradiente Layers / New Raster Layer Selections / Select all Abra o tube mentali-misted1684/ou o tube de sua escolha Edit / Copy – Edit / Paste into Selection Selections / Select none Effects / Image Effects / Seamless Tiling / Default Adjust / Blur / Gaussian Blur / Radius 10 Abra a Mask mask edith 94 no Psp e a minimize Layers / New Mask Layer / From Image Aplique a mask edith 94 e marque a opção "Invert Mask data" 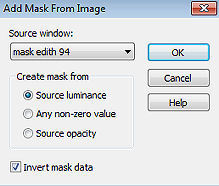
Layers / Merge / Merge Group Adjust / Sharpness / Sharpen Layers / Duplicate Ative a Layer abaixo (Group - Raster 2) Effects / Plugins / Tramages / Tow The Line / Default Effects / 3D effects / Drop shadow: 10 / 10 / 50 / 10 - preto Repita com -10 / -10 / 50 / 10 - preto Adjust / Sharpness / Sharpen Ative a layer do topo (Copy of Group - Raster 2) Effects / 3D effects / Drop shadow: 10 / 10 / 50 / 10 - preto Repita com -10 / -10 / 50 / 10 - preto Layers / New Raster Layer Pinte a layer com a cor 4 Abra a Mask Monaiekje mask 35 1 e minimize no Psp Layers / New Mask Layer / From Image Aplique a mask Monaiekje mask 35 1 e desmarque a opção "Invert mask data" 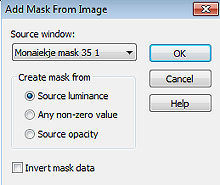
Layers / Merge / Merge Group Selections / Load/Save Selection / Load Selection from Disk Aplique a seleção "SelectionMDesign Beautiful Autumn" 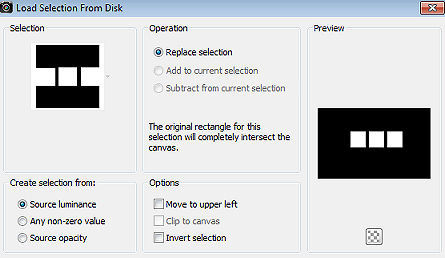
Abra novamente o tube mentali-misted1684/ou o de sua escolha Edit / Copy – Edit / Paste as New Layer Selections / Invert Aperte a tecla Delete uma vez Selections / Invert Selections / Modify / Select Selection Borders: Both sides / Edge width 1 /Anti alias marcado 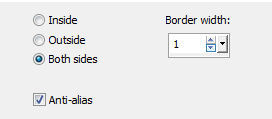
Layers / New Raster Layer Pinte a seleção com a cor branca Selections / Select none Layers / merge / merge down Effects / 3D effects / Drop shadow: -10 / -10 / 50 / 10 - preto Layers / New Raster Layer Selections / Load/Save Selection / Load Selection from Disk Aplique a seleção "SelectionMDesign Beautiful Autumn 1" 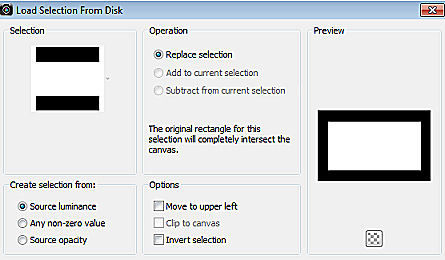
Abra o tube mentali-misted1684/ ou o de sua escolha Edit / Copy – Edit / Paste into Selection Selections / Select none Layers / Arrange / Move Down Repita o Move Down Effects / Plugins / MuRa Seamless / Sharpen: 185 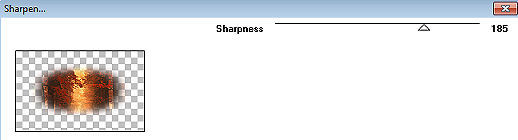 Ative a layer acima (Group - Raster 2) Effects / 3D effects / Drop shadow: 5 / 5 / 50 / 5 -preto Repita com -5 / -5 / 50 / 5 - preto Ative a layer do topo (Raster 2) Layers / merge / merge down Repita o Merge down Layers / New Raster Layer Pinte a layer com a cor 3 Abra a Mask Ildiko_Desings_Created@Mask_r9 (6) e minimizeno Psp Layers / New Mask Layer / From Image Aplique a mask Ildiko_Desings_Created@Mask_r9 (6) 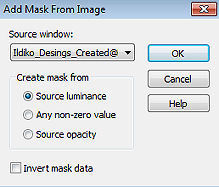
Layers / Merge / Merge Group Effects / Plugins / Graphic Plus / Cross Shadow / Default Repita o Graphic Plus Effects / Distortion Effects / Wave: 0 / 100 / 6 / 100 / Transparent 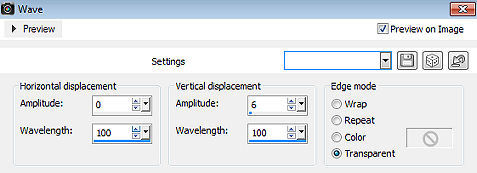
Effects / Texture Effects / Blinds: 2 / 100 / cor Black / Light from left/top marcado 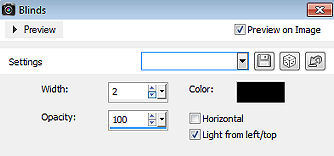
Layers / Arrange / Move Down Repita o Move down Mude o blend mode da layer para Multiply Effects / Plugins / ScreenWorks / Pin Hole Effects / 3D effects / Drop shadow: 0 / 0 / 50 / 5 - preto Repita o drop shadow Ative a layer do topo (Raster 3) Abra o tube da Árvore (Tree) Edit / Copy – Edit / Paste as New Layer Effects / Image Effects / Offset: Horizontal -188 / Vertical -11 / Custom e Transparent marcados Mude o blend mode da layer para Dodge Effects / 3D effects / Drop shadow: 10 / 10 / 50 / 10 - preto Repita com -10 / -10 / 50 / 10 - preto Abra o tube 1f5791f1 Edit / Copy – Edit / Paste as New Layer Effects / Image Effects / Offset: Horizontal 209 / Vertical 50 / Custom e Transparent marcado Mude o blend mode da layer para Dodge Effects / 3D effects / Drop shadow: 10 / 10 / 50 / 10 - preto Repita com -10 / -10 / 50 / 10 - preto Abra o tube Buttons Edit / Copy – Edit / Paste as New Layer Effects / Image Effects / Offset: Horizontal 12 / Vertical -99 / Custom e Transparent marcados Effects / 3D effects / Drop shadow: 5 / 5 / 50 / 10 - preto Repita com -5 / -5/ 50 / 10 - preto Abra o tube Text Edit / Copy – Edit / Paste as New Layer Não mova Effects / 3D effects / Drop shadow: 10 / 10 / 50 / 10 - preto Abra o tube feminino / ou o de sua escolha Edit / Copy – Edit / Paste as New Layer Resize, se necessário Effects / 3D effects / Drop shadow: 10 / 10 / 50 / 10 - preto Abra o tube WAMDesign Beautiful Autumn Edit / Copy – Edit / Paste as New Layer Mova para a direita (veja modelo final) Image / Add Borders / symmetric: 4 pixels com a cor 4 30 pixels com a cor branca 4 pixels com a cor 4 Selections / Select all Selections / Modify / Contract / 38 Effects / Plugins / AAA Frames / Photo Frame: 5 / 0 / 0 / 2 / 0 / 0 / 0 / 100 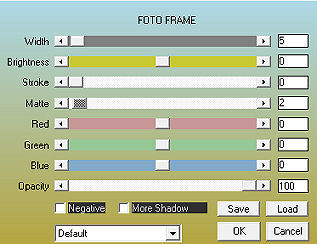
Selections / Select none Layers / New Raster Layer Assine Layers / Merge / Merge All Layers https://maantje-psp-design.jouwweb.nl/beautiful-autumn |  |
|


