WildLife 
Obrigada Maantje por autorizar a tradução  Agradecimentos aos criadores dos materiais: Background Lecture 33 - Animal EllyD masks @ildiko_mask - Exkizz SelectionsMDesign Wild Life WA MDesignWildLife Plugins: Unlimited 2.0: Two Moon / Wish it would Rain Mock / Windo VM Toolbox / Seamless Tile / Tiler DC Layer / MergencyII Filter Factory Gallery J / Drink To Me UnPlugged Effects / Patern Offset Dither ** Visual Manipulation / Transmission MuRa's Seamless / Sharpen Alien Skin Eye Candy 5 Impact / Glass AAA Frames / Photo Frame Toadies / What Are You? Graphic Plus / Cross Shadow Material Aqui Coloque as seleções na pasta "Selections" do Psp Se usar outros tubes e cores é possível alterar o blend mode e a opacidade da layer porque pode dar diferença no resultado do efeito Escolha 4 cores de seus tubes Aqui foram escolhidas as seguintes cores:  cor 1 #ffffff / cor 2 #f07c1e / cor 3 #fca548 / cor 4 #cd9b66 Coloque no Foreground a cor 1 e no Background a cor 2 No foreground forme o gradiente: Style Linear / Angle 50 / Repeats 1 / Invert desmarcado 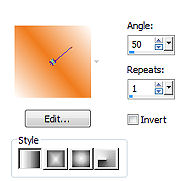
Abra uma imagem de 800 x 500 pixels, transparente Pinte a imagem com o gradiente Effects / Plugins / Visual Manipulation / Transmission: setting: 70 / 36 / 0 Layers / New raster layer Selections / Select all Abra o "Background Lecture 33" ou o Background de sua escolha Apague a marca dágua Edit / Copy - Edit / Paste into selection Selections / Select none Effects / Image Effects / Seamless Tiling / Default Adjust / Blur / Gaussian Blur 30 Abra a "Mask @ ildiko_mask_2016_05 (1)" e minimize no Psp Layers / New mask layer / From image aplique a mask @ ildiko_mask_2016_05 (1) 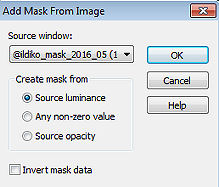
Layers / Merge / Merge group Effects / 3D Effects / Drop Shadow: 10 / 10 / 50 / 10 - Preto Layers / Duplicate Effects / Plugins / Unlimited 2.0 / Two Moon / Wish it would Rain: setting: 150 / 200 / 64 Effects / Plugins / Unlimited 2.0 / Mock / Windo: setting: 150 / 200 / 25 / 25 / 25 / 25 Layers / Arrange / Move Down Mude o blend mode para Multiply Ative a layer do topo (Group - Raster 2) Image / Mirror Effects / Plugins / MuRa's Seamless / Sharpen: setting: 190 Ative a layer abaixo (Copy of Group - Raster 2) Layers / New raster layer Selections / Load/save selection / Load selection from disk localize e aplique a seleção "SelectionsMDesignWildlife" 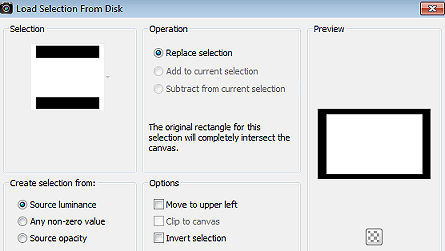
Abra novamente o "Background Lecture 33" ou o Background de sua escolha Edit / Copy - Edit / Paste into selection Effects / Plugins / AAA Frames / Foto Frame: setting: 20 / 0 / 0 / 15 / 0 / 0 / 0 / 100 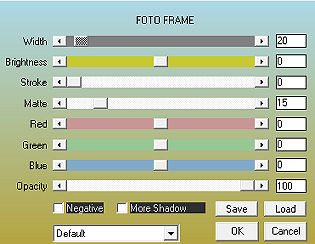
Effects / 3D effects / Drop shadow: 0 / 0 / 50 / 10 - preto Repita o drop shadow Selections / Select none Layers / Arrange / Bring To Top Baixe a opacidade da layer para 75 Layers / New raster layer Pinte com a cor 2 Abra a "Mask Ildiko_Desings_Created @ Mask_ & (11)" e minimize no psp Layers / New mask layer / From image aplique a mask Ildiko_Desings_Created @ Mask_ & (11) 
Layers / Merge / Merge group Adjust / Sharpness / Sharpen Effects / 3D Effects / Drop Shadow: 5 / 5 / 50 / 5 - Preto Layers / New raster layer Pinte com a cor 4 Abra a "Mask Ildiko_Desings_Created @ Mask _ & _ ildiko_kjk 1a-35b (20) (1)" e miminize no psp Layers / New mask layer / From image aplique a mask Ildiko_Desings_Created @ Mask _ & _ ildiko_kjk 1a-35b (20) (1) 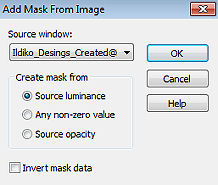
Layers / Merge / Merge group Effects / Plugins / Unlimited 2.0 / DC Layer / MergencyII / Default Layers / Arrange / Move Down Layers / Duplicate Ative a terceira layer de cima para baixo (Group - Raster 3) 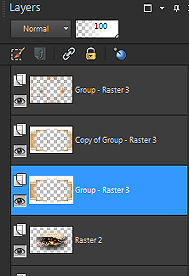
Selections / Select all Selections / Modify / Contract 60 Effects / Plugins / AAA Frames / Foto Frame: setting: 20 / 0 / 0 / 15 / 0 / 0 / 0 / 100 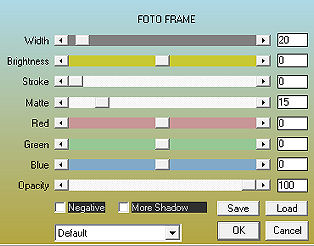
Selections / Invert Aperte a tecla Delete Selections / Select none Ative a segunda layer de cima para baixo (Copy of Group - Raster 3) Mude o blend mode da layer para Soft Light Image / Free rotate / right / 90% - nada mais marcado Effects / Plugins / Unlimited 2.0 / VM Toolbox / Tiler / Default Effects / Plugins / Unlimited 2.0 / Filter Factory Gallery J / Drink To Me: setting: 13 Effects / Plugins / Unlimited 2.0 / UnPlugged Effects / Patern Offset Dither / setting: 190 Effects / Plugins / MuRa's Seamless / Sharpen: setting: 190 Ative a layer do top (Group - Raster 3) Layers / New raster layer Selections / Load/save selection / Load selection from disk aplique a seleção "SelectionsMDesignWildlife1" 
Pinte a seleção com a cor 2 Effects / 3D Effects / Buttonize: setting: 20 / 10 / 75 / Transparent 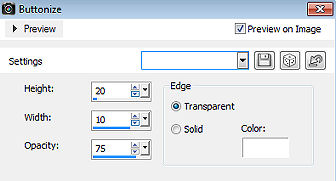
Selections / Modify / Contract 2 Effects / Plugins / Alien Skin Eye Candy 5 Impact / Glass: Settings: Clear, No Drop Shadow Selections / Select none Effects / Plugins / MuRa's Seamless / Sharpen setting: 190 Effects / Plugins / Toadies / What Are You?: 15 / 15 Effects/ 3D Effects / Drop Shadow: 5 / 5 / 50 / 5 - preto Mude o blend mode da layer para Dodge Layers / Duplicate Image / Mirror Selections / Select all Selections / Modify / Contract 20 Layers / New raster layer Pinte a seleção com a cor 4 Effects / Plugins - AAA Frames - Foto Frame setting: 20 / 0 / 0 / 10 / 0 / 0 / 0 / 100 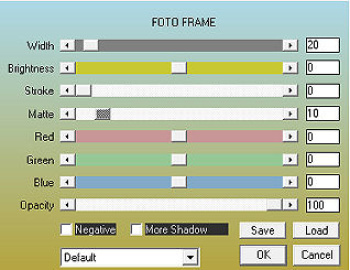
Selections /Modify / Contract 35 Aperte a tecla Delete Selections / Select none Effects / 3D Effects / Drop Shadow: 2 / 2 / 50 / 5 - preto Repita com -2 / -2 / 50 / 5 - preto Layers / New raster layer Pinte com a cor 3 Abra a "Mask Exkizz_MaskPrisme 3" e minimize no psps Layers / New mask layer / From image aplique a mask Exkizz_MaskPrisme3, com "Invert Mask data" marcado 
Layers / Merge / Merge group Effects / 3D Effects / Drop Shadow: 2 / 2 / 50 / 5 - preto Image / Add borders / symmetric marcado 2 pixels com a cor 1 Effects / 3D Effects / MuRa Seamless / Sharpen: setting: 60 Abra o tube Animal ou o tube de sua escolha Edit / Copy - Edit / Paste as a new layer Resize como achar melhor Mova o tube ligeiramente para a esquerda Effects / 3D effects / Drop shadow: 5 / 5 / 50 / 10 - preto repita com: -5 / -5 / 50 / 10 Image / Add borders / symmetric marcado 2 pixels na cor 2 10 pixels na cor 4 Com a varinha mágica clique na borda de 10 pixels Effects / Plugins / Graphic Plus / Cross Shadow / Default Selections / Select all Selections / Modify / Contract 18 Effects / Plugins / AAA Frames / Foto Frame setting: 12 / 0 / 0 / 11 / 0 / 0 / 0 / 100 
Selections / Select none Abra o tube "WAMDesignWildLife" Edit / Copy - Edit / Paste as a new layer Mova para a borda direita, como no modelo Layers / New raster layer Assine Layers / Merge / Merge all layers https://maantje-psp-design.jouwweb.nl/wildlife |  |
|


